Well it's often been documented that the term bushcraft can encompass so many interests and skills but for me (and I guess most bushcrafters) fire by friction is a desirable, maybe even core skill. At the time of compiling this blog page I've been using a bowdrill for eight years and decided to set about getting some thoughts down in writing which soon turned into something of an opus like run through. I primarily write a blog as a sort of diary of what I've done and been up to that I can look back on, so this page isn't intended as a straight how to but how I did it and indeed a how I do it now because some parts of the whole process have changed or been refined over the years.

I'm equally sure that many hobbyist bushcrafters have enthusiastically rushed out and chased this holy grail and been disappointed. I decided that I wanted to minimise any setbacks and would take as long as it took to be as sure of myself as it is possible when self learning. I collected the components one by one, as and when I found them but only after I'd studied copious forum posts, watched Ray Mears and others on Youtube, visited bushcraft websites, read books and talked to those who knew face to face, but more on this later. Latterly I've been helping Woodlife Trails as a course assistant so I get to see JP firelighting a lot, and I've also attended an excellent one-to-one lesson with Jason Ingamells at the World of Bushcraft centre, Bedford in early 2014 to review my skill set and well, just to have a pyro geek out for over two hours! From hereon in, any references to the wood used in sets will be the drill wood first, then the baseboard.


After digesting all the above sources of information I plumped upon, and learned using willow/ willow and I finally joined the FFFF (fire from friction fraternity...Just something I made up) on 28th September 2008 on only the fifth attempt. Attempts 1-3 saw a lot of smoke and cool brown dust (I recall seeing smoke seconds into my first go and being so inwardly excited), I then achieved an ember on go 4 which I hadn't secured in the tinder bundle and it blew out and go five saw me achieve fire. I was so happy that I cut out and saved the depression that I succeeded with and as I had repeated successes with willow I tried a few other woods like ivy, poplar and hazel. I also remember trying sycamore but I don't recall any successful usage of this wood early on, either as part of a mixed set or as a combination.
Later on I discovered the hazel drill and lime baseboard combination and got lazy....Incidentally, the open book (above right) is a shot of an article I did in collaboration with Dale Collett for the Scout Association book The Outdoor Adventure Manual. I had started asking well known outdoorsmen if they would be happy to contribute articles and I'd already done the bowdrill article and had the pictures taken so I approached Dale to see if he would be happy to run his eye over the passage and put his name to it-He was, top man. Incidentally whilst they got Dale's name correct in the article, they re-christened him Dave in the credits!


I'm equally sure that many hobbyist bushcrafters have enthusiastically rushed out and chased this holy grail and been disappointed. I decided that I wanted to minimise any setbacks and would take as long as it took to be as sure of myself as it is possible when self learning. I collected the components one by one, as and when I found them but only after I'd studied copious forum posts, watched Ray Mears and others on Youtube, visited bushcraft websites, read books and talked to those who knew face to face, but more on this later. Latterly I've been helping Woodlife Trails as a course assistant so I get to see JP firelighting a lot, and I've also attended an excellent one-to-one lesson with Jason Ingamells at the World of Bushcraft centre, Bedford in early 2014 to review my skill set and well, just to have a pyro geek out for over two hours! From hereon in, any references to the wood used in sets will be the drill wood first, then the baseboard.


A shot from my World of Bushcraft bowdrill 1-2-1 and the Outdoor Adventure Manual bowdrill article
After digesting all the above sources of information I plumped upon, and learned using willow/ willow and I finally joined the FFFF (fire from friction fraternity...Just something I made up) on 28th September 2008 on only the fifth attempt. Attempts 1-3 saw a lot of smoke and cool brown dust (I recall seeing smoke seconds into my first go and being so inwardly excited), I then achieved an ember on go 4 which I hadn't secured in the tinder bundle and it blew out and go five saw me achieve fire. I was so happy that I cut out and saved the depression that I succeeded with and as I had repeated successes with willow I tried a few other woods like ivy, poplar and hazel. I also remember trying sycamore but I don't recall any successful usage of this wood early on, either as part of a mixed set or as a combination.
Later on I discovered the hazel drill and lime baseboard combination and got lazy....Incidentally, the open book (above right) is a shot of an article I did in collaboration with Dale Collett for the Scout Association book The Outdoor Adventure Manual. I had started asking well known outdoorsmen if they would be happy to contribute articles and I'd already done the bowdrill article and had the pictures taken so I approached Dale to see if he would be happy to run his eye over the passage and put his name to it-He was, top man. Incidentally whilst they got Dale's name correct in the article, they re-christened him Dave in the credits!

So before any fire lighting is attempted the kit needs sorting and I'll start with the bow. When a drill is loaded in to a bow it is done so that it runs on the outside of the cordage (this will feature pictorially later) and this is the reason why a bow's curvature doesn't have to be large but there is no reason why it can't have a bigger curve and that is the preference for some folk. Jason uses a fairly curved bow (see the first picture at the top of the page) and I raised this during my session with him and he said he likes it because looking at it helps him to keep the bow level. I find a narrower curvature to the bow means that I don't have to turn my hand too far into an unnatural position (hang your arms by your and side see where your hands are positioned).
I almost exclusively use paracord 550 which is cheap, easily available and grips the drill well. I have also experimented with climbing cordage after reading a Dale Collett article on the subject in Bushcraft and Survival Skills magazine (issue 37) and you can see a shot with climbing rope in it later on. Note to self, more experimentation with natural cordage.
I almost exclusively use paracord 550 which is cheap, easily available and grips the drill well. I have also experimented with climbing cordage after reading a Dale Collett article on the subject in Bushcraft and Survival Skills magazine (issue 37) and you can see a shot with climbing rope in it later on. Note to self, more experimentation with natural cordage.

Looking at the close up picture (above) there are several notches and knots featured. The bow on the right of the picture has two lengths of rather understated hi viz orange paracord because I used it when it was fresh and a little springy so one length is for the drill, and one to tension...literally two strings to my bow. The knots are discussed later in their own section.
The notches (a bit like a nock on an arrow) are for engaging the cordage at either end. The bow in the centre and centre left have a basic v shaped notch cut out which works but the second one is tied with a bowline which tends to come off when stored and I've duly changed the knot. The bow on the far left and centre right have a shaped notch which is, to my mind, a superior fitting. The bow on the far right has a fork at the end of the stick which has been utilised. a lot of the bow drill set's dimensions are measured on the body and this includes the bow which should be around the diameter of a finger or thumb and tip to tip should measure the distance from your sternum to your fingertips, regardless of the bow curvature and shouldn't give at all. I've also seen bows with a notch out of either side too, very similar to a bow of the arrow variety.


Once you've formed your notches you'll need to think about knots, initially I used to form a sort of round-turn and two half hitches but I now try to use the following recognised knots.
The knots on the round of wood are from 12 o'clock; a bowline with an overhand stopper knot for good measure, an anchor knot (this is a more secure version of a round-turn-and-two-half-hitches), an archery knot from The Ashley Book of Knots that is effectively a clove hitch finished with two half hitches around the standing part and an overhand loop. Having said that I sometimes end up tying a hybrid knot as the moment demands, usually a couple-of-round-turns-and-several-half-hitches or a taut-tarp-knot-and-two-half-hitches for example. The knots can also be seen in the earlier two pictures of the bows too. View this website for more knot tying information.


The notch I prefer starts with a cross, cut with a slight rocking blade action (right to left in this example). You then carefully cut away the wood but you always finish the cut diagonally on the left with the view to forming a point. The aim is to get it going from shallow to deep and the point slightly angled in so that the paracord knot or loop you choose has something to engage with. It's quite hard to describe and the picture above right helps visually.

The knots on the round of wood are from 12 o'clock; a bowline with an overhand stopper knot for good measure, an anchor knot (this is a more secure version of a round-turn-and-two-half-hitches), an archery knot from The Ashley Book of Knots that is effectively a clove hitch finished with two half hitches around the standing part and an overhand loop. Having said that I sometimes end up tying a hybrid knot as the moment demands, usually a couple-of-round-turns-and-several-half-hitches or a taut-tarp-knot-and-two-half-hitches for example. The knots can also be seen in the earlier two pictures of the bows too. View this website for more knot tying information.


So to the baseboard which is sometimes referred to as a fire board. This particular length is from a large piece of seasoned lime that Will Lord kindly gave me at a show in 2015. The first thing that you need to do is a thumbnail test on the wood, if you can gently dig your thumbnail into the wood and leave a small mark then it should be good to go. The above left shot is of a length of around 15 inches (the minimum is room for the drill and your foot so perhaps ten inches as a minimum?) which I've initially split down it's length on a wooden chopping block. Run your eye down the cut length and make any adjustments if it is not fairly flat.
Turn it round, tilt length to 30-40 degrees off vertical and start putting some stop cuts into the wood, these are measured cuts that don't remove any wood but make a series of flaps. This whole process is one where you move the wood around, not the axe head which is worked in the vertical plane.

Then tilt the length back to an almost vertical angle and with a positive axe action clear the stop cut flaps away, this is a good way to remove material in a controlled way. Keep turning and repeating until the desired depth is reached but do keep an eye out on the overall board thickness as you go. I did a fairly tame example here but initially bigger, bolder stop cuts can be made initially depending on the original wood thickness.When using any edged tool think twice, cut once.
The finished baseboard should be roughly a thumb thickness in depth (about an inch), I've got boards a little thinner but lime is fairly soft so an inch is preferable. It should also be as level as possible but any slight imperfections can usually be negated by finding suitably contoured ground to negate when used (see the trouble shooting guide later).

The chopped and shaped baseboard will be seen later on and will be used repeatedly and I will probably cut it along it's length to liberate the middle wood and therefore get more goes out of it. A more simplified baseboard is shown above which again is lime. One side was cut flat and then the side that has the depression in was simply shaved to the correct thickness to receive it.


Some woods such as hazel, willow and lime can usually be easy to identify, but not so long ago I had a sort through my collection of woods and hoofed a lot out because they weren't suitable, but equally I handled some pieces that looked OK but struggled to come up with a suitable id. I've recently started branding drills, baseboards and uncut lengths with pliers mounted paperclips bent into letters which has helped no end. I heat the letter in the gas flame of the hob until it glows a uniform orange, and then quickly brand the wood making sure it's in a place that won't subsequently get cut out. It's actually rather good fun.


A bearing block not only holds the drill in place from above but it also allows pressure to be applied when needed. Actually to me the use of the word block is a little misleading as it seems to infer the exclusive use of wood as the material to use. Whilst wood will be available if you are making a set from scratch in a wood it can be any inert material that has a depression in it to hold the drill tip. I use wood but also, after my one-to-one session, I have grown to like using doubled up limpet shells. I've also recently married up a limpet shell into a rather worn wooden bearing block too, JP uses a knuckle from a deer and Will Lord sells bowdrill sets that utilise a section of antler. Some folk use artificial bearing blocks such the middle of a skateboard wheel and each to their own but it's not something that interests me.
I used to make too deep a cone shaped socket in my bearing blocks thinking that most of the upper drill point needed to be in it but it doesn't, just enough to control it but not too little that may make the tip ping out or even snap off. If you have a choice use hard wood and if possible look for options other than cutting fresh wood; is there a suitable length lying on the ground? Is there a piece partly submerged in a watercourse?
I also have some fairly old blocks which are now so polished as to not need any lubrication. If you use new fresh wood you may not need any, but otherwise you will probably have to think about adding something 'wet' to both lubricate and dampen down to prevent friction at the top of the drill with the obvious material being fleshy leaves. Make sure the leaves are well squashed (add some spit!) because you run the risk of material falling into the depression and notch whilst in use. Carving the cone and adding water into it whilst you crack on with the rest is another option. If you keep and reuse your blocks periodically check that the socket that engages the top of the drill isn't getting worn to a larger size over time.


The two pictures above show the two styles of tinder bundle. The one on the left is the one I initially chose for this sequence of demonstration pictures and is a bit of everything. The main part of the bundle is dried bracken and grass with the middle containing buffed grass (grass that has been scrunched up and massaged to make the fibres 'fluffed up' which helps combustion) and cleavers with thistle down and silver birch in the centre with a piece of crampball or even charcloth as an extender (it takes a spark and helps with blowing the bundle to flame). I normally push both thumbs into the centre of the bundle to create the space for the coal to go (about a third of the way in I guess).
The other bundle is using dried grass which can't be formed into a bundle without breaking it. It would need something like a buffed grass and birch bark centre to be complete.


The drill needs to be straight and about the width of a thumb and measure from elbow to wrist, this is the biggest measurement change for me because when I first started out I was using a drill that was the the fingertip length between my outstretched thumb and finger. If you chose hazel then you are usually onto a winner as it can grow long lengths of straight wood and is perhaps the closest wood to an universal drill. If your drill isn't straight then you'll need to carve it and remember to do the thumbnail test similar to the baseboard test mentioned earlier. This length of hazel is (obviously) a little too long so I cut it down to size, removed any nobbles along the length and carved the bottom end of the drill to a shallow point and the top a tapered point. This is to maximise the friction within the baseboard and minimise it in the bearing block.

If you are re-using a drill then there's no need to scrape it back to unburnt wood to re-profile it as that negates all your previous efforts to carbonise the base in the first place. I usually curve the very tip and scrape a sort of four petaled flower shape which usually shapes it sufficiently to start with and also adds a little roughness at the same time.

The picture above is demonstrating the starting of the baseboard depression that the drill will sit in. I've got the board under the ball of my foot and just over a couple of centimetres or so in from the edge of the board (you can offer the drill tip up to the board to get a good idea of positioning), insert a sharp knife at an angle and carefully and slowly spin it round to form a depression that mirrors the bottom of the drill. If the two shapes are vastly different you'll get an area that doesn't char later due to lack of contact. This lime is really softwood so it would be possible to sharpen the drill tip to a steeper point and start off with an initial pilot hole made with the knife tip. Knots should be avoided due to their structural makeup.
Jason showed me this method of making the depression and I prefer it to holding the block and doing it. Back in the summer of 2011 I did a bowdrill article for a magazine and, without boring you with the how and why there was a picture that accidentally got published that didn't show the best technique. I clarified it in the next issue but felt a bit scapegoated at the time so it's almost cathartic to put the above image in.
Jason showed me this method of making the depression and I prefer it to holding the block and doing it. Back in the summer of 2011 I did a bowdrill article for a magazine and, without boring you with the how and why there was a picture that accidentally got published that didn't show the best technique. I clarified it in the next issue but felt a bit scapegoated at the time so it's almost cathartic to put the above image in.


Next the drill needs loading into the bow string. Hold the cordage near the middle in one hand, the drill diagonally in the other underneath the cordage. With a firm anti (counter) clockwise movement turn the drill over the back of your other hand and the cordage will start to wrap around the drill, it will be the opposite way round of course if you are left handed. It should be tight and go with a 'dunk' sound.

You should now have the drill engaged in the cordage outside the arc of the bow as this will allow for the longest possible strokes. Watch this Dave Canterbury video to see how inhibiting a drill loaded on the inside is). Whilst the drill is in this position try and slide (not roll) it up and down the cordage, if it moves easily then your bow string isn't taught enough and you can find that when bowing the cordage moves but the drill doesn't if it isn't taut. If it is tight enough and you haven't got the strength to engage the drill like this then if the bow isn't too thick try placing one end of the bow on your hip, place the hand that was holding the cordage on the other end and gently push to flex the bow which may allow you the temporary slack to do it. However you get it in hold it tight! It surprised me just how tight it needs to be when I started out.

Stand on the board with the ball of the foot, not the arch. Note the position and angle of the rear leg, my knee is in line with my left leg and is at an angle which forms a roughly triangular shape which gets the trailing leg out of the way of the drill, gives a stable platform to drill and also helps to stabilise the bearing block. Note the doubled up limpet shells on the board ready to be used.

Now with tinder sorted, drill in the bow, limpet bearing block and baseboard in place, trailing leg angled, arm hooked around the leading knee and torso over the kit it's show time. Some folk position their foot right up close to the drill, I'm happy to be an inch or away. When using limpets as a bearing block (use two for strength or they'll break at the apex of the shell) I taper the pointed end of the drill to try and match the shell's inner angle.

When I initially taught myself I was almost battling the wood to give me fire and went off like a nutter when bowing but there's no need to. This stage is to properly marry up the depression and the drill for maximum contact and in this instance to char both surfaces as the board and drill were previously unused. You should aim for steady, regular strokes which maximise the bow's length and with enough pressure to keep the drill in place. Look at not only the depression to see what's happening but also at the string around the drill and bow to check that the bow is doing strokes parallel to the ground (I still find that I have a habit of letting the bow rise on the forward stroke every now and then).
Don't be surprised if the drill suddenly shoots off at any stage of drilling because if you tilt the drill/ bearing block from a vertical/ horizontal position or don't apply enough pressure then it may well happen and yes, it still happens to me. It can also occur if your drill isn't straight so you may need to carve it to correct this issue.
If your set is viable you should get wisps of smoke fairly quickly and once it's had, say, 10-15 seconds smoking you have probably done enough to stop. When I stop I reach my fingers and them down from the bearing block, hold the drill and lift the set up so if I think the depression could do with a little more bedding in I'm good to go again. There is a picture of the drill being lifted later on.
Don't be surprised if the drill suddenly shoots off at any stage of drilling because if you tilt the drill/ bearing block from a vertical/ horizontal position or don't apply enough pressure then it may well happen and yes, it still happens to me. It can also occur if your drill isn't straight so you may need to carve it to correct this issue.


If the ground isn't too hard I stick the top of the drill into the ground when not using it as this keeps the business end from the ground, and it may help to prevent charring in the bearing block. Note that the drill tip is now rounded. I was happy with this depression as it is a centimetre or so from the edge and uniformly dark in colour. If there is a lighter part (often the centre) it suggests that the drill and depression shapes weren't well married and if I have that happen I usually re-shape the drill and bow it again for a short period. you'll notice a Swiss Army knife in the right hand side picture above being measured against a folding saw, more on this later...
Now to the bit I like least, cutting the notch.

This is the part that I find really easy to make a mistake on and the fails are usually not cutting a notch of the right size, cutting it too big or the apex isn't pointed. Now you can slowly cut the notch with a sharp knife, saw or a combination of both which is what I do. I use both the fixed blade and a Swiss Army knife saw at this stage and I'm marking a central line with the latter down the middle of the depression to the edge for guidance.

I then flip the board on it's side and mark again. In and earlier picture were I'm holding a Swiss army knife saw blade alongside a regular folding saw well that's to show that whilst they are of a similar width, the folder is a shorter blade and has smaller, closer teeth which I prefer for cutting the first part of the notch. You are aiming to cut a one eighth 'cake slice' out of the baseboard to the centre of the depression and I start by making a central cut to about the edge of the depression, then I do two angled ones to the same depth using the central one as a guide.

This portions of this cut should snap out when you gently bend it side-to-side and look like the above picture, and once the piece was removed I noticed that one of the cut angles was a bit too wide (on the left of the picture). This to me is the greatest advantage of removing the notch in two stages because using a saw removes bulk in a timely fashion but only doing part of it allows me to rectify the angle if needs be. The biggest notch I've ever accidentally cut was a quarter (see the troubleshooting section) and whilst I got close to an ember it didn't generate enough powder and the drill kept shooting out as it was unstable anyway. Make it appreciably too small however and the powder can't collect to form an ember and there is a lack of air too.

I then finish off the apex of the 'pie slice' with careful and controlled carving using a sharp knife. I'm not telling anyone how to suck eggs by saying sharp, rather it makes the cutting easier than using a dull one.

Another reason for only using a saw halfway is that if one saw cut goes just past the centre you'll still stand a chance of getting an ember but the drill will often develop a 'nipple' in the centre of the drill as the wood is forced through the hole and doesn't wear down like that around it. I've included a pictorial reference later on.

I've also flared the two edges of the notch on the underside. Jason showed me this to help in inclement weather and JP slopes the whole of the notch to allow easy collection of the charred dust so I've added it into my procedure. If you do produce an ember in inclement weather you can leave it to develop in the flared notch and tap the drill end into the depression which helps pump air to it. One last thing to check is that the sides are carved as smoothly as possible otherwise the char can get caught on any rough areas and hinder the ember development.

The ember pan is simply a dry piece of bark or a sliver of wood and shouldn't be too thick, in this case I'm using a lime one saved from when I carved the base. I am about to place the baseboard on it to catch the soon-to-be generated dust. Make sure it is longer and wider than the notch. I've read that birch doesn't make a good ember pan which I assume relates to it's tendency to curl up when heated (it needs folding if used as a splint). With it's flammable oils I've often wondered about using a scraped piece of silver birch just to see if it would catch fire with an ember on it. Another note to self...

Just before I start drilling I very gently score the bottom of the drill a couple of times by placing the knife blade on top and rocking it back and forth. It really doesn't need to be deep but it just adds a bit of bite when the bowing starts. I used to add dry grit to the depression as an abrasive but quickly stopped as my technique improved and it's not always easy to find bone dry grit out and about anyway. You'll know and feel when a set is working smoothly but scoring the end can, on occasion, cause a little temporary squeaking...I'm really pleased that when talking to an established bushcraft instructor about bow drilling once he was magnanimous enough to say he'd didn't know this. Note that the thumb from the knife hand is steadied on the drill, and the thumb from the other hand is on top of the blade for both safety and close control.

Again start with controlled strokes using the length of the bow cordage and you should start to see a whiff of smoke after a few seconds. Keep going and the smoke will become regular and at this stage I usually speed up a little. When it starts issuing to the point where it's twirling up the bottom of the drill apply some controlled downward pressure and keep bowing for say, a count of ten and stop. If you find that the cordage isn't tight enough at any stage of bowing you can reach down with the index and middle fingers of your bowing hand to grip the cordage and gently squeeze to get it tighter.

Now I mentioned earlier about lifting the set up in one go, again it is useful at this stage because if you don't see smoke coming from the notch once you've stopped you can quickly get the drill in position and get going again. If you are doing this on a warm day watch that a bead of sweat doesn't run down your face and put the fragile ember out.

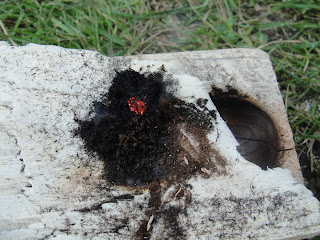
The small whiff of sustained smoke and dark dust colour tells me that the ember is viable. Notice the powder around the rim? Well I posted a similar picture on Facebook a while ago and a well respected bushcraft instructor suggested this dust around the depression is possibly because the notch is ever so slightly short of the depression centre and the dust gets pushed up the depression sides instead of into the notch. That said, there are similar images in some trustworthy tutorials available on the web so the jury is out on that for me.
As you can see, the hot dust can collect in volume within the notch and if you cut it too close or even on the edge you'll have a job on your hands. angling the drill may help but it's not easy to sustain. I'd suggest cutting your losses and starting a new depression.

Here I've used a length of dried grass from the 'straight' tinder bundle to gently tease the developing ember out. Hold the board and gently insert the grass into the apex of the notch at about 45 degrees with the other hand. very gently pull the ember away with the grass whilst equally gently moving the board away in a slightly tilted motion (see the above picture). You can actually see that the ember is roughly triangular. As well as a length of dried grass you could also consider using a thin twig, a leaf stalk, feather quill or Swiss army knife tool to help tease the ember out.


The left hand side picture above clearly shows smoke, the developing ember and some of the initial lighter brown dust, I sometimes put a little of the light brown dust on the ember if it is on the small side to help it but don't smother it with loads. Now out of the notch this ember is very vulnerable and needs protection, think of the male drill and the female board creating a baby that needs nurturing.
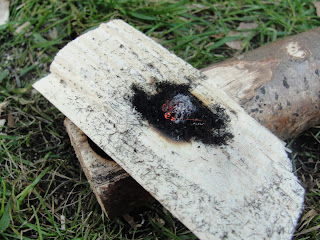
It needs to reach a temperature of 130 degrees centigrade as it coalesces from an ember into a coal and it should be kept out of any breeze, also if the ground is wet it would be advisable to carefully lift it up and away from any potential moisture issues whilst cupping your free hand around the edge of the ember pan.The above right hand side picture above is of me gently wafting the air above the ember to get oxygen into it (don't blow it at this stage as it's too delicate). You should start to see it glow orange when you do.

Almost there but equally, this is a stage were you can, quite literally, snuff out all of your hard work. Bear Grylls is much maligned but he has a spot on analogy for this stage. Treat the ember as a butterfly that you've caught in your hands; squeeze too hard and you'll kill it, don't hold it securely and it'll get away and I'd be surprised if both haven't happened to anyone trying.
I stick my thumb in the pocket I made to help hold it open and clear and offer up the now grey and fully formed coal to the top of the bundle, I then angle the bundle slightly and gently tip the coal in and sometimes it will need a gentle tap on the ember pan with your index finger because if it is left for a time it can bond to the ember pan as well as itself which is pictured later). If you are using an extender as previously mentioned like a piece of crampball (or even charcloth) try and land the coal near this if at all possible. Personally I don't always use extenders because they won't always be available.


You then gently push the pocket to a slightly closed position which allows the coal to get oxygen from you, secures it and puts sufficient material in close contact with it to work on. If there is a breeze align it over your shoulder from behind. Make sure that your breaths are good steady ones similar to blowing a candle out, as opposed to a quick one like if you are blowing a fly off your arm. Don't blow too close to the bundle because you can potentially introduce moisture from your breath. Also, any fresh matter in your bundle can generate steam when it gets hot.
When you need to take a breath pull your head back slightly and the extend the bundle forwards which allows air to get in via the movement but also allows you a smoke free lung full of air. Some folk make the bundle movement a quick and large arc whilst drawing breath but I personally don't do this.
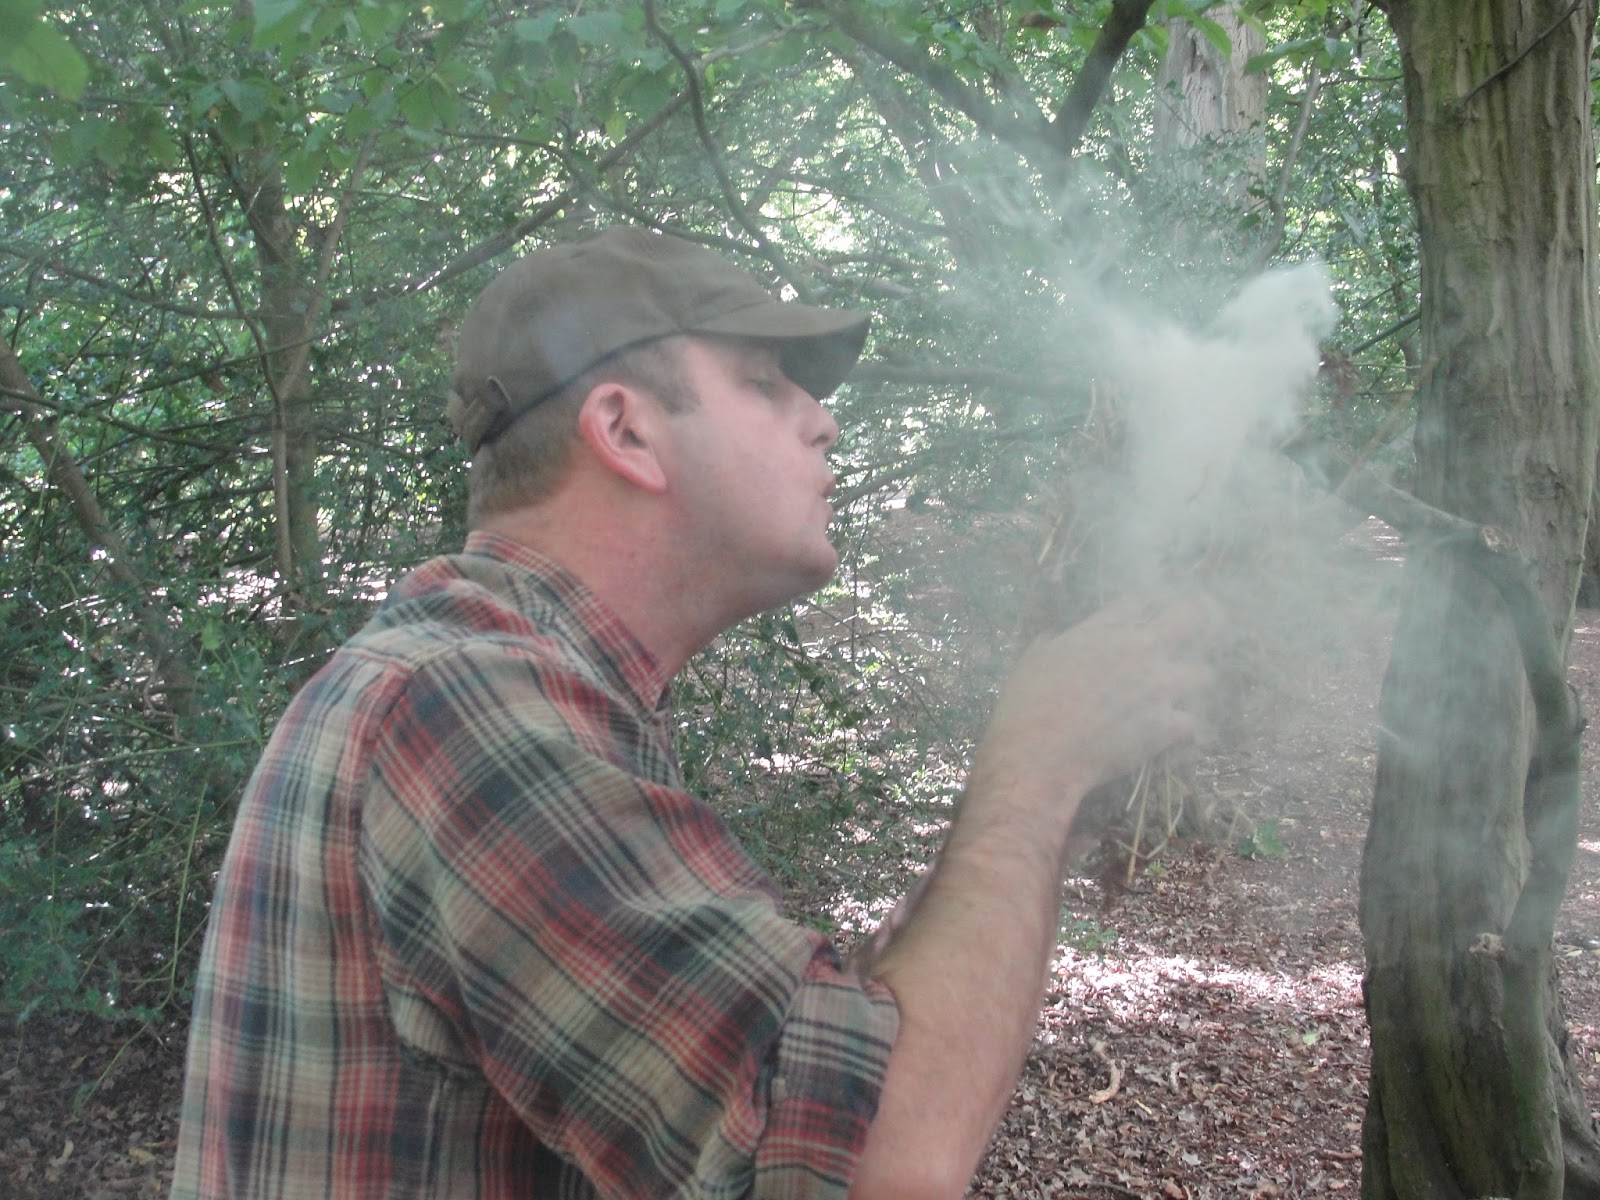

Smoke will slowly get more voluminous and eventually go a sort of 'smooth' creamy colour and consistency (this is apparently when the gasses are about to ignite) and á voila. If you are using it to light a fire invert the bundle to allow the flames to work on the bulk and remember to do it near your fuel.

And whilst in the mood I decided to bother the straight grass bundle with an coal too. Not my favourite type of bundle due to it's inflexibility, so therefore note to self, I must practice using them more...
I have done a separate page with just the actual bowdrill section which can be seen here.


Just as an aside...It's said that silver birch shouldn't be used as an ember pan which I assume is because it has a tendency to curl when alight, but if it may have a tendency to ignite if used as an ember pan then I thought 'Let's try it and find out'. In this particular attempt I knocked out a beast of an ember and despite allowing it time to form up I couldn't quite manage it, even though I could smell the shavings smoldering and indeed, the solid piece of bark burnt right through. I'll probably revisit this at some stage. But I digress...
During my bowdrilling adventure (it truly has been and indeed still is) it will come as no surprise that I have come across a few issues, and anyone who has trodden this path that says otherwise is a fibber. I have therefore decided to do a basic troubleshooting section and put some thoughts down on various elements. Most of these have been staged but some are genuine (and I ain't saying which are which!).


The drill tip above left is one that has been used on a notch that was cut slightly too far past the central point (and maybe a wide as opposed to a pointed notch either) and therefore the middle bit of the drill wasn't exposed the friction that the outer parts were. It's potentially possible to still get an ember but this will also depend on the integrity of the notch.
The depression above right shows two shortfalls; the notch apex isn't bang on the centre of the depression and the slightly oval depression shape shows that the drill isn't perfectly round. Being on the edge can also mean your drill pings out as there is less of a rim to help retain it and it is possible to drill at an angle to overcome it (although it isn't easy). Again, if luck is with you an ember is doable but it makes life harder and the process less than smooth but for the record this depression did deliver.


A drill should be as straight as possible for a smooth operation. A bent drill will potentially cause vibration and depending on the degree of curvature will make usage between hard and impossible.
The drill pictured above right shows not the business end, but the more pointed top end. It is showing significant charring and could potentially lead to smoke issuing from a wooden bearing block.


Polishing can cause issues when bow drilling. This is actually a shot of the top end of a drill that has polished itself to a mirror shine which is a good thing, but get polish in the depression and drill and it can cause a fearful screech, as well as hinder the process.
This limpet shell bearing block give way whilst bowing and it comes as no surprise that everything literally grinds to a halt. The shells aren't bombproof (hence why two are needed for strength as well as to protect your hand form a heat a little) and it will happen sooner or later...Just be prepared for it.


A split baseboard is something that will probably happen at some stage, in fact I had a board split almost literally straight away just before I got my successful fifth ember when learning (this example of a split is due to a knot in the wood) but a thin or punky board may also suffer.
The notch cut in the depression should be about one eighth, this excessively wide notch is perhaps one quarter. I did try my best but it proved just a little too big, the ember just wouldn't come due to the lack of surface area and the drill repeatedly pinging out.


Smooth cordage can cause the drill to slip, as can loose cordage and I personally find the former is potentially exacerbated if the drill is smooth. Despite being a top notch natural cordage this lime bast cordage is showing the strain. Well worn paracord is easily checked by running it through your closed hand. If the wear is excessive it will go from feeling rough to smooth to rough.
As mentioned earlier punky wood, which is sort of a cross between crumbly and spongy and is often not structurally up to the job for either drill or base wood. That said I squeezed a few embers out of this long in the tooth poplar base.


Uneven baseboard. I overcame this particular kink by placing the twisted bit in a depression in the ground and I also find that using the ball of my foot to help with the angle is a useful trick too, although prevention is better than cure. Almost predictably a twisted base can cause the depression to be at an angle too with the potential to send your drill flying.
Beware moisture which can cause a hideous squeak (as can polished surfaces and slightly unseasoned wood...The latter of course contains a high water percentage). This moisture occurred underneath a plastic lid from a lawn on a sunny Autumn day after being there for about five minutes with the previous four days being rain free which demonstrates it's presence. Species such as willow are prone to attracting water (hydrophilic), and don't forget that any less than dry tinder can cause you issues too.
As I practiced I did something after each attempt, I smelt my hands and the baseboard after I'd finished. To me there's something slightly different about the charred smell from that of a fire and it does linger on your hands. Remember the smell because if you get even a little charring it means you are doing something right and the smell will remind you of that. I know it's easy for me to roll out the cliches and sage words but if an attempt doesn't produce an ember then mentally retain the good bits and analyse the bits that didn't go so well, failure is only that when you don't learn something from it. It's what helped me...
I mentioned some of the resources I studied when I was learning. The Natural Bushcraft and Bushcraft Uk forums are excellent places to gleen information. I also used Jon's bushcraft bowdrill article as a useful reference whilst learning as it's clear and detailed and was set in a garden which resonated with me as it was my learning ground too. If I were setting out to learn now I'd also include Paul Kirtley's bowdrill blog page as a reference and reading it again whilst compiling this blog page it really does set the right tone and gently but firmly encourages, and his two thirds quote is bang on the money. Dave Watson has relevant bowdrill articles in Bushcraft and Survival Skills magazine issues 2, 5, 8 and 17 and Keith Bosely's Botany of the Bow Drill article from the Summer 2013 issue of Bushcraft magazine details many different wood properties. Also try Joe O'Leary's The Wilderness Survival Guide book Mors Kochanski's Bushcraft: Outdoor Skills and Wilderness Survival book
As for Youtube you pays yer money and yer takes yer choice. There are some very poor videos on there and to be honest you can't really go wrong with the Ray Mears clips from his TV shows in the first instance. This is my favorite Mears video from Extreme Survival series two in the Rocky mountains. It's visual with no verbal instruction but is a clear video and shows how wood doesn't always cut in a neat circle when making the depression, and also shows at the end how far the drill will potentially eat through the baseboard.
Another Mears video from the excellent 'Tracks' series where he uses sycamore which he preps with a piece of flint and I bear this in mind when I have sycamore fails. For a video that extols the virtues of perseverance then this video of Ray the bushcrafter teaching Ray Goodwin is worth seeing. It is noticable that (bushcraft) Ray doesn't correct (canoe) Ray when he puts the bow on the inside of the bow arc.
Other non-Mears videos to view would be Andrew Price's (Dyrad bushcraft) video which is part of his A-Z of bushcraft series, Jason from Bushcraft & Survival Skills' demo video from the ExCel Outdoor and Leisure show, and finally this video, by Woodlife Trails, is well worth the watch for inspiration...You are never too old!
And to finish off this section, I'll quickly list the different cordage I have used to date. There are loads out there to try that are man made and natural and I'll experiment with others in due course.


Paracord. It's cheap, reliable, easy to get your hands on and arguably the most common man made bowdrill cordage. It can stretch a little in my experience and like any other cordage can wear over time. Click here to view my big paracord article.

Bootlaces. They are often a little on the short side for loading onto a bow but they have the advantage of being close at hand if you ever needed to use a bowdrill in a hurry. You can have the best of both worlds if you change your laces for paracord.

Lime bast cordage. One of the toughest natural fibres but that doesn't stop you biting your lip when you but it under strain loading a drill into it. I weave this with the superior pieces, make sure they are about 2 cms or so wide and allow plenty of overlap when weaving pieces together. Despite being tough it takes a beating. See here for how to make lime bast cordage.

Climbing cordage. You can see both these lengths in the last section of this blog page. I tried them after reading the afore mentioned Dale Collett article in Bushcraft and Survival Skills magazine about bowdrill cordage. I prefer the thinner of the two which isn't unlike paracord whereas the thicker one really grips the drill but has the slight issue of being a bit of a pain to tie onto the bow.
Salmon Skin. I made the above video of my first attempt at using veg tanned salmon skin as a bowdrill cordage. I try twisted and a strip and have mixed results but I did get an ember after lots of huffing and puffing.
Towards the start of this page I mentioned some of the woods that I've previously used before spending too much time with the Hazel and Lime combination. Rather than just list them here I've decided to not only include them when revisited but to investigate new combinations too so occasionally some of these notes refer to the first and only time that I've used them. Long, thin dust fibres can be an indication of moisture so some of the first time combinations listed may genuinely have long fibres or it could just be moisture, another reason to revisit them to find out. I've really gone for it and to date I'm at the mid-thirty combination mark.
I've also included any near misses, bloopers and issues as well as successes and indeed will include failures with notes when they occur. I will include a picture with any noteworthy comments so this part of the page is an ongoing personal project that gives me a permanent reference and if the combinations are of use to someone out there then it's all well and good...Oh, and wherever possible whilst taking the shots I've tried to enhance some of the pictures by wafting the embers to make them glow. As with above, the first wood refers to the drill and the second to the base board. In no particular order...
Hazel/ Lime

Arguably the 'easiest' combination to use and therefore the reason that I've self indulged with it. That said it is a nice combination and usually delivers a quick ember and may I suggest as you read on that Hazel may be the closest we have to the universal drill, and Lime the universal base? Perhaps not 100% bombproof but I feel a tad more confident with one or the other in the set and notice the drill stick into the ground as detailed earlier. The pyrographed WILL on the side refers to the fact that it's the Lime from Will Lord and not Willow. Well I know what I mean!

Lime/ Lime

This was a combo that I'd largely overlooked because as previously mentioned, Hazel marries up so well with lime as a baseboard. During my early successes I was using thicker drills than now as well as slightly shorter ones too (about a finger length short of elbow to wrist). For a time there was a lady who lived on a barge near me and got a waterways license to collect wood that fell along the river to turn into saleable items. I went to see her and got two lime drills turned with slots in to hopefully hold the cordage in one place (#fail). I had a few half-hearted goes with these drills but they soon got relegated and forgotten about.
When I started reviewing the woods I'd used I thought it time to try and use one for old times sake if nothing else. I whittled one down to a more manageable (but still a little too wide) width and smoothly made a strong ember. At the time of writing this is the combination of wood that Will Lord uses in the sets he sells which I linked to earlier.
Willow/ Willow

As stated earlier, this was the combination that I first succeeded with but pretty much stopped using once I discovered Hazel and Lime. Rediscovering this combination was a joy because it produces a decent fibrous ember that seems to hold together well. As mentioned earlier there used to be a lady who did carving and wood turning on her barge near me and interestingly she said that the dried Willow shavings seemed to clump together when thrown on her fire.
Poplar/ Ivy

Interesting one this. It smoked very quickly and I perhaps did a couple of seconds more bedding in of the depression than was needed and the the dust generated was very dark and didn't actually seem too far from sustaining itself (if you look at the outer rim of the depression you can see that it is scorched in places). now this was the first time that I'd tried this combination but it could be the new Hazel and Lime because the dust fell over itself to make an ember in double quick time. Looking back at the picture I noticed a small 'fault line' across the depression which didn't cause any bowing issues but equally did it somehow enhance the ember making process in a way that a smoother depression might not? More investigation needed.
Willow/ Sycamore

I mucked up the previous attempt on this board with a bungled notch but still came close to an ember. The next attempt was bowed a little longer than it needed so it pretty much produced two decent embers.
Ivy/ Ivy

When I studied the bowdrill discipline I found it strange that Ivy was a contender because it's wood but not a tree. This is a unique combination in that I find the dust darkens very quickly and it's easy to stop bowing prematurely, the drill polishes very easily and smokes for some time after bowing ceases, the smokes profusely when the ember is near...Oh and the ember is a beast! Admittedly I generated excess dust so that I wasn't caught out but the ember was very very strong (with long fibres). I decided to purposely drop it about six inches onto the baseboard to see how it coped, the above picture is after the test drop with minimal damage. I then dropped it from about two feet onto the ground and despite being damaged it was still a viable ember albeit 50% of it's original size.
Poplar/ Lime

This is another fantastic combination which produces a very easy ember, and what an ember! I produced this particular one pictured despite a niggly breeze and it was the smallest amount of wind made this light show and it displays this king of embers superbly (I had another shot that actually lit up the depression and turned it light brown).
Also on occasion a coal 'sticks' to the ember pan if left any time on there and will need coaxing off. This particular attempt was also memorable for the fact that just after lightly scoring the drill end I accidentally brushed my recently stropped knife blade with my index finger, and it caused one of those small yet bloody capillary cuts and I was relieved to reach the ember stage as the quite real risk of putting it out with blood, let alone sweat, was slowly becoming a reality. Note the stains on the limpet bearing block.
Silver Birch/ Silver Birch

Birch is a wood that I'd rather overlooked but I suddenly had the notion when chopping some firewood to give it a go. I had a rather windy day to try and mistakenly thought I'd achieved an ember due to the quick smoke and copious and dark char that had formed. I made some re-adjustments and hit the jackpot on the second go. The dust is quite needle-like and when l tried tipping the ember onto the baseboard to test it's durability it stuck to the ember pan (I had left it on there some time though). Note the ember smoke ring. Have a read of how I came to make this set here.
Hazel/ Ivy

Ivy is quite a dense baseboard wood (compared to say, Lime) and I had to shave a little off this particular board because I felt that the inch depth was a bit too much as the depression wear and tear just isn't there like softer woods. After a quick coming to with an axe I generated a beast of an ember which made the underside of the ember pan noticeably warm. The ember is pictured with the remnants of the first go and is on top of the baseboard's underside to show off some spalting.
Elder/Clematis

I'm no expert but I know that an Elder drill and Clematis baseboard is a good hand drill combination so I thought I'd upsize and give it a go as a bowdrill set, and this was the first combination using it. Initially I couldn't even get the smallest whiff of smoke, then it was almost as if a switch had been flicked and it smoked profusely with the drill tip continuing to smoke after drilling stopped. Once the ember came it seemed to be of average quality.
Elder/ Poplar

Although fresh Elder wood is rather weak, once dried it is actually quite durable (I know of one wood worker who has handled tools with it). This combination smoked copiously very quickly and as a result I stopped a moment too soon. After a bowstring adjustment I continued to a successful ember but as you can see it chewed through about three quarters of the baseboard on the way to a good ember.

Cedar/ Cedar
I was asked if I could use some Cedar fence post off-cuts for anything and decided to give them a fire by friction work out. This combination chucks out a lot of dust very early on and moving forward I think slow and low is the way to go due to it having a Lime-like softness to it. It also smokes copiously too. The ember was good a survived the laboratory test dropping from the ember pan. The wood is pleasantly scented but smell of the freshly used drill end reminded me of a cross between Christmas and curry powder! See the Cedar bow drill blog page here.
Sycamore/ Ivy

I really had to drop a gear to achieve this because whilst it smoked quickly and copiously the ember took some achieving. Once there it sustained itself for some time but as you can see from the excess powder it was earned. The charred fibres are very long and thin and don't suggest that they knit together willingly in the first instance. This board is shown flipped on it's side to show some spalting.
Lime/ Hazel

I found this harder than the other way round, the classic Hazel/ Lime, although to be fair the base was heading towards punky and the drill was a tad shorter than I'm used to. The coal didn't knit together that well.
Elder/ Willow

This set smokes quickly and copiously and even as it becomes a viable coal it is still noticeably smoking. The dust is very dark and it wasn't the strongest of embers but even so it came out of the notch and kept a triangular shape.
Willow/ Poplar


This combination seems really smooth regarding coal production, the powder darkens quickly but seems to be a bit of a contradiction whenever I've used this combo. When initially bedding in the depression there's often some dark dust left stuck to the surface, and the next stage produces a good amount of dark dust very quickly. The contradiction for me is that the coal seems very fragile for such a 'sticky' powder and the session for this picture saw the coal stick to the ember pan when tipped! I encouraged it off with a small stick and despite still being viable it was a bit stringy and didn't sustain on it's own very well.

Ivy/ Willow

Two fairly firm woods together and I find that this combo isn't that smooth and a drop a gear and go approach was needed to generate an OK ember. It was a breezy day and to be honest it makes the ember look a little better than it actually was.

Buddleia/ Buddleia

I had some seasoned Buddleia and decided to have a crack whilst making some baseboards. Smooth bowing went out the window with this set and I ended up bowing like a nutter. The dust smoked but despite copious wafting of the dust it wouldn't knit together to form anything other than a small coal which eventually went out leaving most of the dust black. It was a humid day when I attempted this so I don't know if that has any bearing but I won't be rushing to try this combination any time soon.
Hazel/ Poplar

This picture appeared on my Facebook memories page and I saved it because it was an early first try with a non-paracord bow string after reading an article about different man made cordage by Dale Collett in Bushcraft and Survival Skills magazine. as you can see it is noticeably thicker than paracord. The set produced a good dark ember fairly easily. Note the small lighter coloured area at the base of the depression which is where the tip and base haven't been quite married up which as it's small didn't affect the outcome but equally, didn't contribute either. The drill is worthy of note too because despite being hazel it wasn't straight enough and needed a little shaping. You can also see that the drill was starting to go quite deep as there is secondary charring on the side of the drill. This quite an old picture hence the larger drill diameter. This is one of JP's favoured combos.
Lime/ Ivy

This combination took some work but once achieved it made a very strong ember. Once I'd taken some shots I flicked the ember off the pan and it just seemed to bounce on the ground, so I scooped it up on a knife blade and dropped it onto the same area from about three feet up...Twice. The picture shows it about half it's original size but still viable.
Elder/ Buddleia

I really didn't rate a Buddleia set when I tried but an Elder drill made smoke after about five seconds which boded well. I had to rough up the drill tip a little as it had polished somewhat. This set, like the smoke, formed dust quickly but whilst the ember was much more viable than the Buddleia set it wasn't superb.
Sycamore/ Willow

I had trouble with this combination, and Sycamore at large, for some time. It's not that I have persevered with the same old set either so with a new set I had another crack a this combination. As you can see I achieved an ember but it wasn't without incident. The set smokes quickly and voluminously and I stopped a fraction too soon and the dust wasn't quite ready. I then had a limpet break to pieces (see picture) and then on the third attempt I got the ember but I made an excess of powder to make sure I secured a result. It was an OK ember after all that and I tried dropping it from six inches onto the baseboard and it survived enough to be viable.
Hazel/ Sycamore

The initial dust that formed stuck together and to the board too, see the dark area below the depression where I scraped the stuff in my hands from. Consequently the ember was robust too. Just for the record I tried a frontal notch and depression which I found just as easy to watch as the ember developed, but found it harder to cut due to it's position for a right hander.


Willow/ Lime

This combination usually produces an average coal but it isn't a bad set to use having said that. I tried dropping the coal onto the baseboard from about six inches to test it's strength and it still would have been usable...Just. The quill of the Magpie feather in the corner was used to tease the ember out.
Ivy/ Lime

With Lime being such a soft wood, and ivy being more a little more robust I find a gentle approach is need or it eats up baseboard wood at a quick rate. That said this combination generates a smooth ember.
Sycamore/ Sycamore

One of Ray Mears' videos shows him using sycamore, and indeed it seemed to be a popular choice when I researched the subject. I have had a real battle to get this wood combination to perform and I finally mastered my nemesis with this effort-It was four year old wood mind you...That said, it worked fairly smoothly and generated a good ember.
Willow/ Hazel

Very quick to bed in and also produced a speedy ember, I reckon it would have been viable about the twenty second mark with a previously unused drill. The resulting ember was good.
Lime/ Willow

I tried this using a rather short lime drill (about two thirds the size) but decided to give it a shot. It was rather hard to achieve an ember due to this and took a couple of attempts. Once there the ember was good.
Poplar/ Poplar


This ember needed a bit of an extended session to get it formed and I guess the slightly punky base didn't help, but once there it was a robust coal. I used a drill that I'd had for a while and had to whittle it down a bit as it was a tad on the thick side. I needed to adjust it slightly as it had a little lip which scorched the outer part of the depression (see above).


Hazel/ Willow

I recall this combination being mentioned a fair bit when I was revising the whole technique but despite being a fairly straightforward ember to make it never seems to knit together that well.
Poplar/ Willow

This produced a fairly quick ember which was OK in quality.
Willow/ Ivy

Another sticky ember as demonstrated in the picture. This combination was very quick to form an ember and was noticeable for the very long needle like dust (see the baseboard in the picture).
Sycamore/ Poplar

Despite the fact that the poplar depression blackened well, as did the char, the coal just wouldn't come.
Hazel/ Hazel

This combination usually produces dark dust quite quickly and makes a decent ember. Note the baseboard which is simply a suitable piece of hazel fashioned into a board by shaving the base flat and then shaving one end to make the depression in.
Ivy/ Poplar

This took a little more effort to produce a coal, both in time bowing and the actual post drilling formation. I left it in the notch to develop for ten seconds as it looked a bit 'fluffy' and it produced an average ember.
Sycamore/ Lime

It wasn't too hard to achieve which is a plus given that at times I've struggled to get regular Sycamore success. Initially I thought I'd stopped bowing a moment too soon because the dust wasn't very dark, but it was viable and formed a decent coal.
Hazel/ Alder

I booked a medicinal plants 1-2-1 with Gary Johnson (Jack Raven Bushcraft) in the late Summer of 2016 and before we set off to the basecamp we stopped by his stores on a farm. In there he had all his bowdrill stuff, both seasoned and un-seasoned, and I asked him how he found Alder as it's a wood I'd never used. He said it's not bad but that you have to earn the ember and he kindly gave me a board to take away. I decided to try it with a Hazel drill. Gary was right, I really found that I needed to put some umph in towards the end to get there.
Lime/ Poplar

This combination was good and produced a good ember fairly quickly.
Elder/ Ivy

The one thing with Ivy baseboards it that it often produces very dark dust very quickly, and this combination was no different. I did this attempt after a slightly tricky combo before and produced quite a lot of dust, but the picture beautifully shows the transition in colour of the dust from light to dark. A fairly decent and durable ember which I flicked off the ember pan and it kept smoking once on the ground..
An excellent article Austin which I will re reading again and sharing. It comes across not only as a good step by step but as a useful research piece for beginners and existing practitioners alike.
ReplyDeletePleased hear that George, thank you. I'd been asked about friction fire lighting by a Cub leader in my pack and initially set out to just do him a 'how to' but it just snowballed. It also helped me whilst I've been compiling it as I've added to my list of wood combinations and even found cutting the notch less odious than usual!
ReplyDeleteAustin,
ReplyDeleteExcellent article I totally agree with George's comments.
I remember your famous picture in the Scouting magazine, take hope and strength from the fact that you didn't shamelessly plagiarise a picture from Ray Mears.
Excellent and enjoyable read!
Julian
Thanks Julian, I have to say kudos to you too for demoing the bowdrill for the whole day at Gilwell 24 on the bushcraft base.
DeleteOne of the best articles so far!
ReplyDeleteKind words Rody, thank you.
Delete