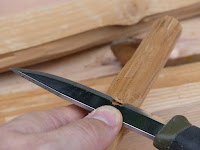
I got a text a while ago from a Cub leader from my pack asking if I wanted any Cedar wood off cuts from some fence posts that he was putting in. Not so long ago I'd made a viable set out of some Silver Birch firewood so I said yes to see how the wood handles and if it gave me some bow drill sets then all well and good.
I'd never used Cedar for fire by friction so there was no excuse not to right that. I also had some seasoned Lime that I was going to utilise but as I'd used it before the Cedar jumped the queue.
I'd never used Cedar for fire by friction so there was no excuse not to right that. I also had some seasoned Lime that I was going to utilise but as I'd used it before the Cedar jumped the queue.
Well I say jumped the queue, the journey of discovery had to be put on ice for about three weeks due to the fact that I cracked a rib on a water slide during our traditional water night at cubs to end the Summer term, and as I was about to go on a special holiday I had to shelve it.
When I eventually started prepping the wood it was surprisingly easy to split and was a bit Lime like in density, but did have a habit of running off to one side and perhaps it was just me but cutting it seemed to create more than the odd potential splinter.
I wouldn't say that I'm the world's greatest carver of wood but I was pleased with my efforts on rounding a rectangular second of Cedar to form the drill which again had a handsome grain.
Whilst I knew the scent would be nice in my garage I have to report that the grain exceeded expectations. It was a good job that it was nice to look at as I felt a slight twinge in my dodgy rib so again I shelved it for a second time.
I had a session of applying pounded Comfrey to my rib and I was then able to get to the business stage of the bow drill set. The set smoked fairly quickly which was encouraging but it didn't go that dark in colour during the bedding in session and I needed to get the drill tip engaged too.
With the light depression colour and the softness of the wood I decided to do a slow and low session of bowing to warm it up. To my surprise the set started chunking out copious amounts of light coloured dust to the point where the notch seemed clogged up and I wondered if it was going to inhibit the ember development. The set really smoked and I was pleased to have a sustaining ember. Note the excess dust around the depression circumference and the light and dark colour of the original and ember material. The smell of the charred drill end was a curious one as it reminded me of somewhere between Christmas and curry powder!
I left the ember to develop and it coalesced into a sturdy one that eventually welded itself to the ember pan. When I create a new ember to record on my labour of love bow drill blog I drop it to see if it is still viable to use after doing so and it was-twice. The first time was on purpose and the wind took it a second time and whilst reduced in size it was still good to go. You can see that the depression did eventually darken.
When I carve a notch in a set to receive the charred dust I flare the bottom edge to make more space, this also helps protect an ember in inclement weather. Well I decided to go for a second attempt and with the dust production I carved the angles a little larger than usual.
As per the first ember it smoked a lot and produced a lot of dust which again is evident around the depression, and goes from chestnut to almost black in and around the ember. The afore mentioned wind was blowing on this coal and you can just see a little smoke ring!.The set queaked during the second attempt which I put down to a slightly smooth drill from the first go so I had to stop to rough up the two surfaces.
I mentioned earlier that the wood felt a bit like Lime in it's consistency, well with the two part attempt on the second ember you can clearly see just how much wear there is and it goes some way to explaining the amount of dust, so a slow and low start is prudent. Note the splinter sticking up to the left of the set as mentioned before.
Suggested reading:-


No comments:
Post a Comment