Showing posts with label spalted birch. Show all posts

Saturday, 17 November 2018

Spalted Firewood Stuff


As detailed in this kuksa blog I had the good fortune to see some spalted birch in a bag of firewood in my local Waitrose and once I'd finished my Kuksa I had to decide what to make out of the remaining wood.


The kuksa was the first thing I wanted to attempt and the blog details the difficulties this kiln dried wood can present.


I had a small and knobbly but highly patterned piece that was waste from the kuksa. I was due to drop my eldest son off in Manchester to start his university adventure and I had a  last minute light bulb moment. I would cut the piece in half, put in a marathon sanding session to both flatten and level the pieces and then carve two hearts, the idea being that my son had one to hang up as did we as a reminder that we were thinking about him whilst away.


Whilst I would have liked just a little longer to refine the shape I was happy to have got them ready in time. I also made and posted one of two key rings from the remaining heart waste.


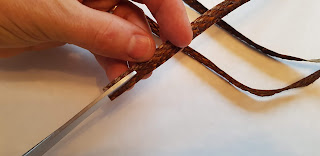
Next up was a slightly a long thin length that had a slight twist to it. I decided to attempt a net needle which I started off at home and  finished on a recent overnighter.


I was quite chuffed that I'd got my eye in to avoid the slight twist but the finished needle still had a very slight bend in it. The bend was minimal and wouldn't have stopped it functioning but I wanted to try and remove it and steam was to be the answer.

I have made myself a wood steamer but it seemed overkill for something a few inches long so I tied the needle between two off cuts and put it through a hot dishwasher cycle which did the job. I finished all the pieces with walnut oil except this one which I tried linseed oil on.


When I started the kuksa I also did a little work on a spoon too, it was now time to finish this off. Six done and onto the next...


The shape of the off cut rather dictated the spoon orientation, the patterning was slightly better on the underside but I was still pleased with the outcome. As detailed in the kuksa blog I was a bit concerned about overworking it and bits falling off so I left the neck of the spoon a little thicker than I'd like but I'm still happy with it.


And onto the final off cut which was arguably the runtiest of the lot. I'd envisaged making a basic camp butter knife but the dark area on in the above picture was a natural depression so I changed tack and decided to utilise this as a bowl on a second spoon. Like the other spoon I had a preference for the underside spalting but of course the depression dictated the orientation.


I got pretty much all the shaping done and then started making the bowl with a crook spoon and it went from fairly plain to the gorgeous oval shaped markings that thankfully didn't disappear as I finished up.


Now my patience with woodworking isn't usually that good, along the lines of if a spoon isn't finished in fifteen minutes it will get the 'Bored now' treatment. As this was desired spalted wood I felt the urge to stick with the various projects to completion.

Should you wish to see a couple of guys making exceptional items I'd suggest visiting  Jon Mac's blog and the primitive point blog


Saturday, 8 September 2018

Spalted Firewood Kuksa


A few months ago I walked past some firewood bags in a Waitrose and did a double take because staring back at me were several pieces of spalted Silver Birch. In brief spalting is bacterial action that often leaves random but beautiful patterning in dead wood and is highly prized for carving.


The one problem is that the wood was kiln dried and therefore I put off attempting anything for ages but decided to recently start doing a little bit every now and then. I decided to try for a kuksa and then work on any decent off cuts another time. The wood's constitution was strange because some bits were indeed rock hard as I expected yet other outer bits crumbled when I used an axe to rough out the shape, this meant that the kuksa wasn't was deep as I had hoped due to a inch sized piece breaking off (literally on the last blow). I soon found that the best way to remove large amounts of material without damage was with a saw.


In fresh wood knots can potentially be problematic but was this one was thoroughly dry it would have made a nice feature but for the fact it was at the end of the handle which was going to be cut down.


I also took a few minutes rough out an offcut piece into a spoon which of course I don't have to worry about drying and splitting whilst unattended. 


Once I'd reshaped the bowl I drew a circle to work out the bowl diameter and then decided to maximise the wood left and did a slightly enlongated design. I then moved onto using a small carving and crook knife and I found that both blades needed a regular tickle as they both dulled quickly.

The uncarved bowl only had a small amount of spalting on it but I was sure that as I progressed I would hit the rich patterning on the underside. And so it happened, I slowly saw a hint of brown and black which gave way to a satisfying finish.


 Even at this stage I was still finding that the  wood tore and broke off in places which was frustrating even with regular stropping, no more so than the outside and rim of the bowl which resulted in me having to remove a lot of wood to get rid of the damage.


I decided that the best way to mitigate any more problems to  put in the long yards  sanding the cup to completion, the last saw action would be to thin the handle down and then shape it. 


I started out using really a really rough roll of sandpaper that would have taken armour off a tank and then, to use a time honoured woodwork phrase, I worked through the grits and finished up with less savage wet and dry paper grades. After each sanding session it was nice to moisten the wood to remove the dust and also to give a tantalising glimpse of the oiled finish.


As I could see the end in sight to the bowl sanding I sketched the shortened handle shape on and roughly shaped it in a series of cuts and used a bradawl to make a hole. I sketched the handle onto a piece of paper and folded it to see exactly how to balance up the slightly asymmetrical shape. Again I finished the shaping with the weapons grade sandpaper and then got smoother thereafter. 


It seemed odd to suddenly reach the point were I am looking at the finished article having put hours and hours into it. I did a test with slightly warmed oil on yet another offcut and then set about the kuksa.


I initially went for one coat but seeing as the wood had absorbed that quite well I opted for a second one later.


I've got loads of  Lime bast cordage that I was going to use with some beads as an embellishment but opted instead for a small thong made from some  Salmon skin leather.


Now this kuksa isn't perfect as I alluded to earlier, there's the odd scratch and pock mark and the bowl is a slight wedge shaped if viewed from the front due to having to remove excess wood to remove a rip. I'm really proud of this, not only because of the type of super dried wood that I used but also I often don't stay the course when  carving something wooden but  the lovely spalting kept me engaged.