
Having just finished a Kevan Palmer fermentation day at Coldsmoking's Milton Keynes converted stable premises I got chatting to the owner Turan T. Turan who arrived just before the end.
I wanted to have a crack at making bacon and purchased some curing salt and then talk turned to smoking and Turan explained that on the food smoking day course he uses a cardboard box for cold smokes. I was taken aback by this because I thought you needed a smoke source, a smoking cabinet and a connecting pipe and decided to attend the day and purchase the kit if I thought I would use it.

This was the booty that I came home with from my smoking day; a smoker, a smoke generator and three bags of Oak, Apple and Beech wood dust.


So to break the purchase down into the nitty gritty. The cardboard smoker is contained within it's own cardboard box and comes with three shelves, a drip tray and a metal base plate.

The layout of this smoker is simple but the outer box has instructions on, as does the outer part of the smoker box.


The inner sleeve of the smoker has three sets of four angled cuts which push through to form the ledges that the metal shelves sit on. The drip tray has two shelf supports which easily fit into two sets of slots which lift the lowest shelf clear of the tray to allow smoke to circulate.

And this is a shot of all the metal parts in situ. Note the small holes around the edge of the drip tray which help to spread the smoke. £25 might sound a lot for a cardboard product but the two cardboard parts fit perfectly as do the trays and shelves so there's no trying to balance cake racks on wooden skewers inside an old Amazon box and even if the and when the cardboard succumbs you'll still have the metal parts to use.

I've included this shot of Turan from the food smoking day to show that the shelves are slotted in and filled one at a time and then onto the next one until completed. Then the inner is slotted into the outer. Note the tape on the box, this is a very well used box that is several years old and the edges have been taped to preserve it. I have done so too from the get go.

And so onto the ingenious smoke generator. It only burns a little dust at any one time, very much like a gunpowder trail fuse in a cartoon, but a lot slower.

The smoke generator has a small tapered compartment at the start of the 'snail shell shape' to insert a tea light to get the smoke dust started. To be honest it's a little ineffectual and a bruleé torch is much more prompt...and satisfying!

I have found that the wood dust consumption is roughly 6 centimetres per hour on average, or a centimetre every ten minutes. Once lit the the smoke is not too dissimilar to an incense stick which I guess is why you don't need two chambers connected by a pipe.

The first day that I went to use it I put it up against the house because of the threat of rain. I had two small lengths of wood to jack it up off the ground if needs be and being close up meant that the prevailing rain will miss it.
And that is the beauty of this piece of kit, it's versatility.

Here it is propped up on two pieces of wood on a garden table with a logo'd bespoke lid. The lid is made from the box it came in and is to hold a plastic bin bag in place if precipitation arrives. I started putting the smoker on this table because it saves you bending down to it all the time but that said it is fairly easy to lift up even whilst smoking is in progress.
The smoke generator is elevated up, burns with a cool heat and has a metal plate underneath so I'm not sure it would damage the table but equally, it's not worth jeopardising the wife points total, hence the two pieces of wood underneath.
I've used this unit many times and the inside of the box is now developing a pleasing dark hue. As with my dehydrator page I will use the rest of this blog to detail timings and wood dust types that I've found work for me and also any tweaks that I may do next time.
I can't recommend this unit enough and you can get them from Coldsmoking.co.uk's shop along with everything from courses to sausage skins. I'm no connection, just a happy chappy with the courses and kit.


This is the first cold smoke load I did in the smoker. It comprised of rindless Edam, Gouda, Cheddar, Red Leicester, Parmesan and Garlic. I removed the rind to give the cheese more surface area and chucked the rind in to be smoked (why not?) with the view to trying to melt it and melt an piece of cheese in it.
All the above was smoked for four hours using Apple and Beech in a 2:1 ratio.

I think the cheese timings are pretty much spot on although the Parmesan did dry a little but it was to be grated into a dish to add a little smokiness anyway so there wasn't a problem.


Whilst the garlic was good it could do with at least an hour or two longer and certainly the cloves didn't look as coloured as I expected. I made two Tzatzikis with smoked and non-smoked garlic and the latter wasn't strong enough to stand out as much as I'd like.


A smoked water experiment. It could be used to add to a dish to give a subtle hint I guess, plus commercial products are often washed in liquid smoke as opposed to the real thing. This was five minutes of smoke into an upturned jar which was then quickly filled with water and the lid put on. It had taken a good amount of flavour when tasted. I don't see me using smoked water but it was worth experimenting with.


This was a little bit of experimentation with some leftover roast chicken. I cleaned and seasoned the cut up skin and diced the meat into small bite size pieces, pan fried separately until crispy and the same with the chicken and then smoked for four hours with Oak and a little Chinese tea mixed in. About spot on time wise.

The one thing that I couldn't wait to try was smoked Salmon. I did 'standard' brined Salmon with a small strip that also had added sugar (the separate part in the above picture). Sad to say that it's not something that I will do on a regular basis as I am the only one in my household who eats it.
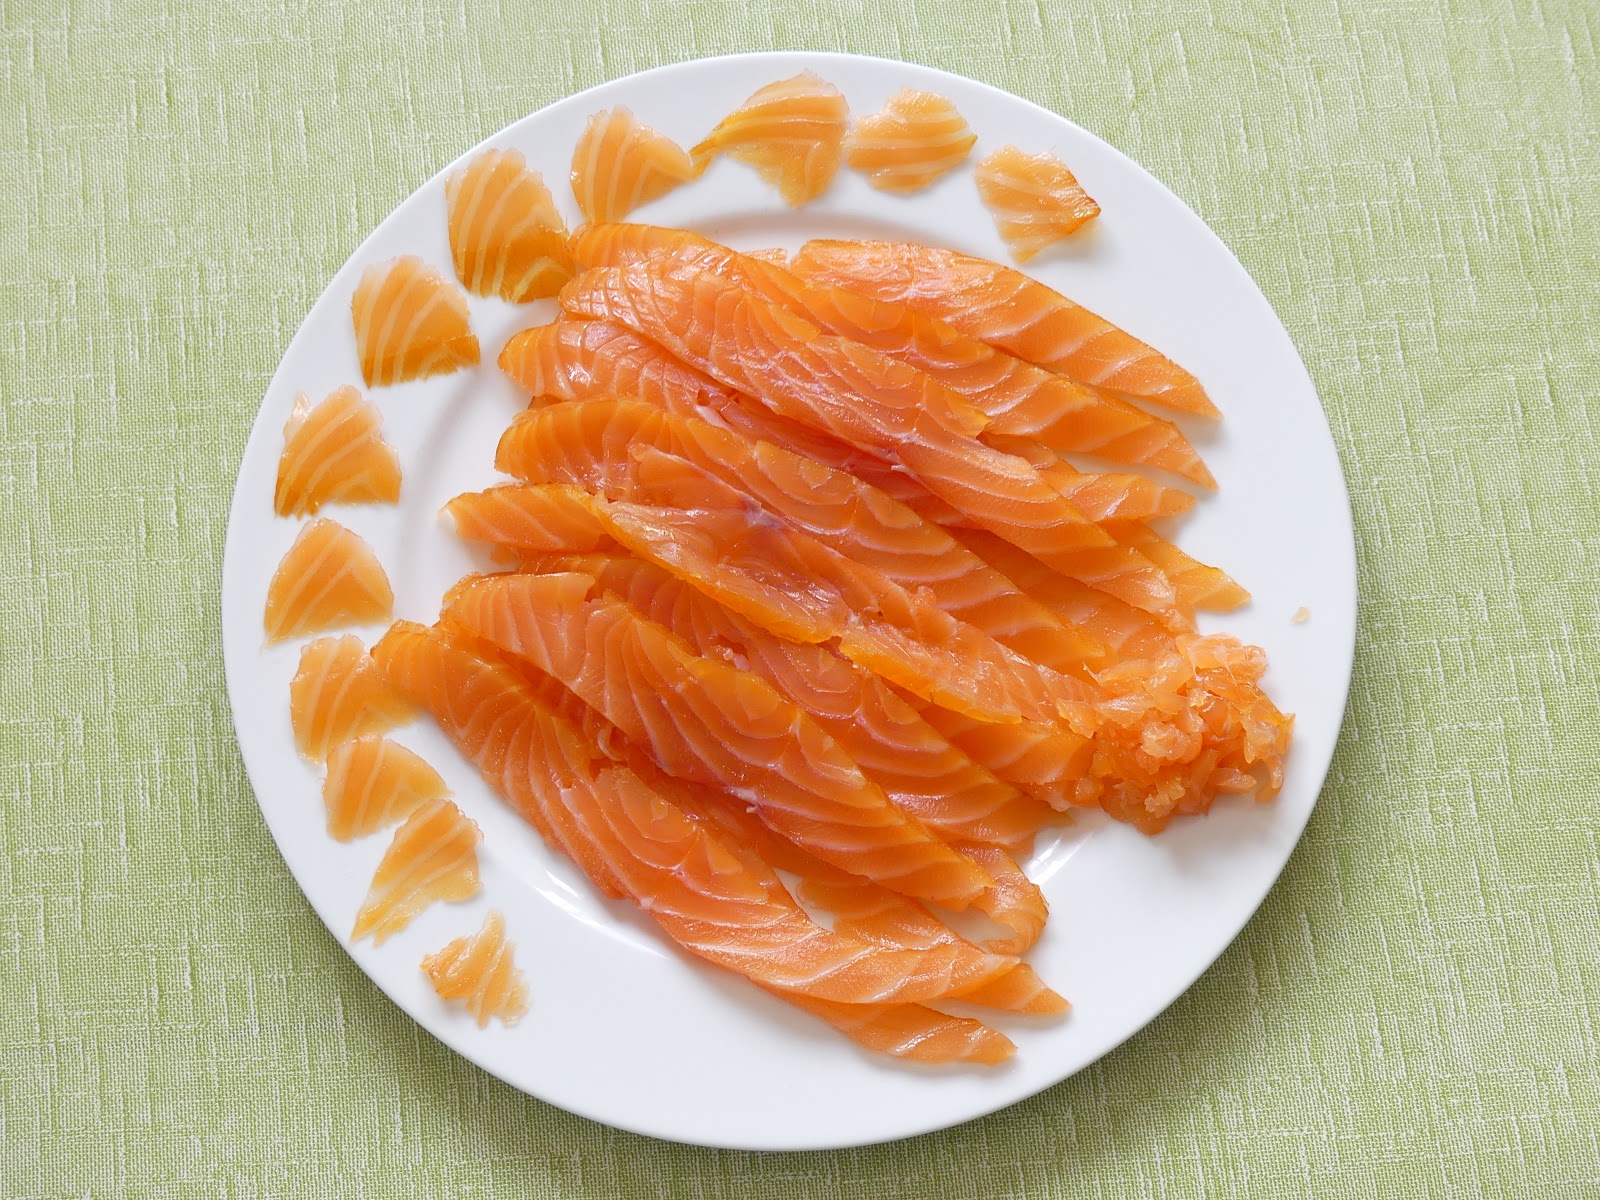

I was really pleased with the finished results and the taste of both cures was good. As per the exclusive online information link that the Coldsmoking owner Turan sends attendees this is Oak smoked for 12 hours.


Two 'I wonder?' experiments to mention. The first is some dehydrator venison jerky that I made, I'd experimented with retro smoking before which was successful so I thought I'd reprise this in the smoker with similar success using Beech for 4 hours.

I smoked some cheese at the same time and then placed a piece of jerky and cheddar in and smoke for an extra hour with a layer of ground up chilli flakes on top of the dust...The smoke is acrid to say the least! It did indeed impart a mild chilli note to both products but I think another hour on top wouldn't hurt.
This Youtube video shows not only how to cure your own bacon but it having a smoke with a nix of Beech and Apple wood for around four hours.

On the food smoking day we were shown how to smoke prepared mixed nuts, well I had a few peanuts left from a Chinese dish so I gave it a go.
I placed them in this small sieve and placed it on top of the smoker near the vent in the top and then placed the lid on top to delay, but not stop the smoke's exit for about 15 minutes. This gave a very subtle smoke to the nuts.

Whilst smoking the some cheese I decided to put a jam jar lid of regular Paprika in with it. I was using Apple wood in this instance. I added the smoked spice to some pre made tomato and bacon pasta and it did have a pleasant smokey taste but equally I think it could stay in maybe double that time.

A minimalist waxing experiment. I used a rectangular piece of Gouda to try and cover it in the Edam wax. The large sheet of foil and parchment paper was to both pour the melted wax into and to prevent it damaging the work surface as I wasn't sure how hot wax got.

I stuck a long needle in one end to act as a handle and the pin in the side is holding on a strip of parchment paper to see if I could replicate the easy open strip that some cheeses, like Baby-Bel have on them.


The wax starts melting a split second that the gas went on and it soon became clear that it needed a very low heat. I carefully poured it onto the angled cheese as I turned it but it only ended up with a minimal wax coating doing this. I also pulled out the pin at this stage.


I then just rubbed each side through the cooling wax until it was coated. When the wax had the same feel as a fresh blob of icing that has just developed a dry skin it was OK to handle and I rubbed wax onto any gaps and the end and finally pulled the needle out and covered the hole.
I ended up with a full, if rather less than smooth finish and I left it a few hours before trying it. The pull tape did actually work albeit in a rather rudimentary way but I noticed that the cheese felt a little greasy on the outside, I think the hot wax probably 'cooked' the outside and having investigated further on the internet the wax is slowly warmed and the cheese dipped but I still got a win for a first crack.
No comments:
Post a Comment