Showing posts with label paracord knitting. Show all posts

Sunday, 22 July 2018

Fire, Nano and Microcord


Having done a copious blog on paracord 550 I decided to do an additional page rounding up fire, nano and microcord.


First I'll cover firecord, which is the true paracord out of the three of them. It is 550 stuff with all the inner strands but it also contains a contrasting red strip of a lighting medium called Livefire. It is moderately easy to buff up into a lightable bundle using either a ferro rod scraper or a knife. 


Once buffed a ferro rod it used to well, totally obliterate the firecord...It is there under the sparks I promise you!


It was fairly easy to light and burns well on it's own, or with the paracord itself, but if you've done any paracord knitting before this point of the blog you'll know it's smelly stuff when it lights.


Livefire is supposed to be totally waterproof and I decided to try this out too. I left a piece sitting in a tumbler of water and it sank which I didn't expect for a waterproof product. I squeezed the length through finger and thumb and again, buffed it like the dry test.


It did light but burnt with a smaller weaker flame than the dry example. The fire cord does work, is handy and can be hung from a rucksack etc, but my choice would be a couple of pieces of Hammaro fire lighter which works in wet conditions and can be secreted in a pocket or rucksack pouch and doesn't create the noxious smoke that burning nylon paracord does.


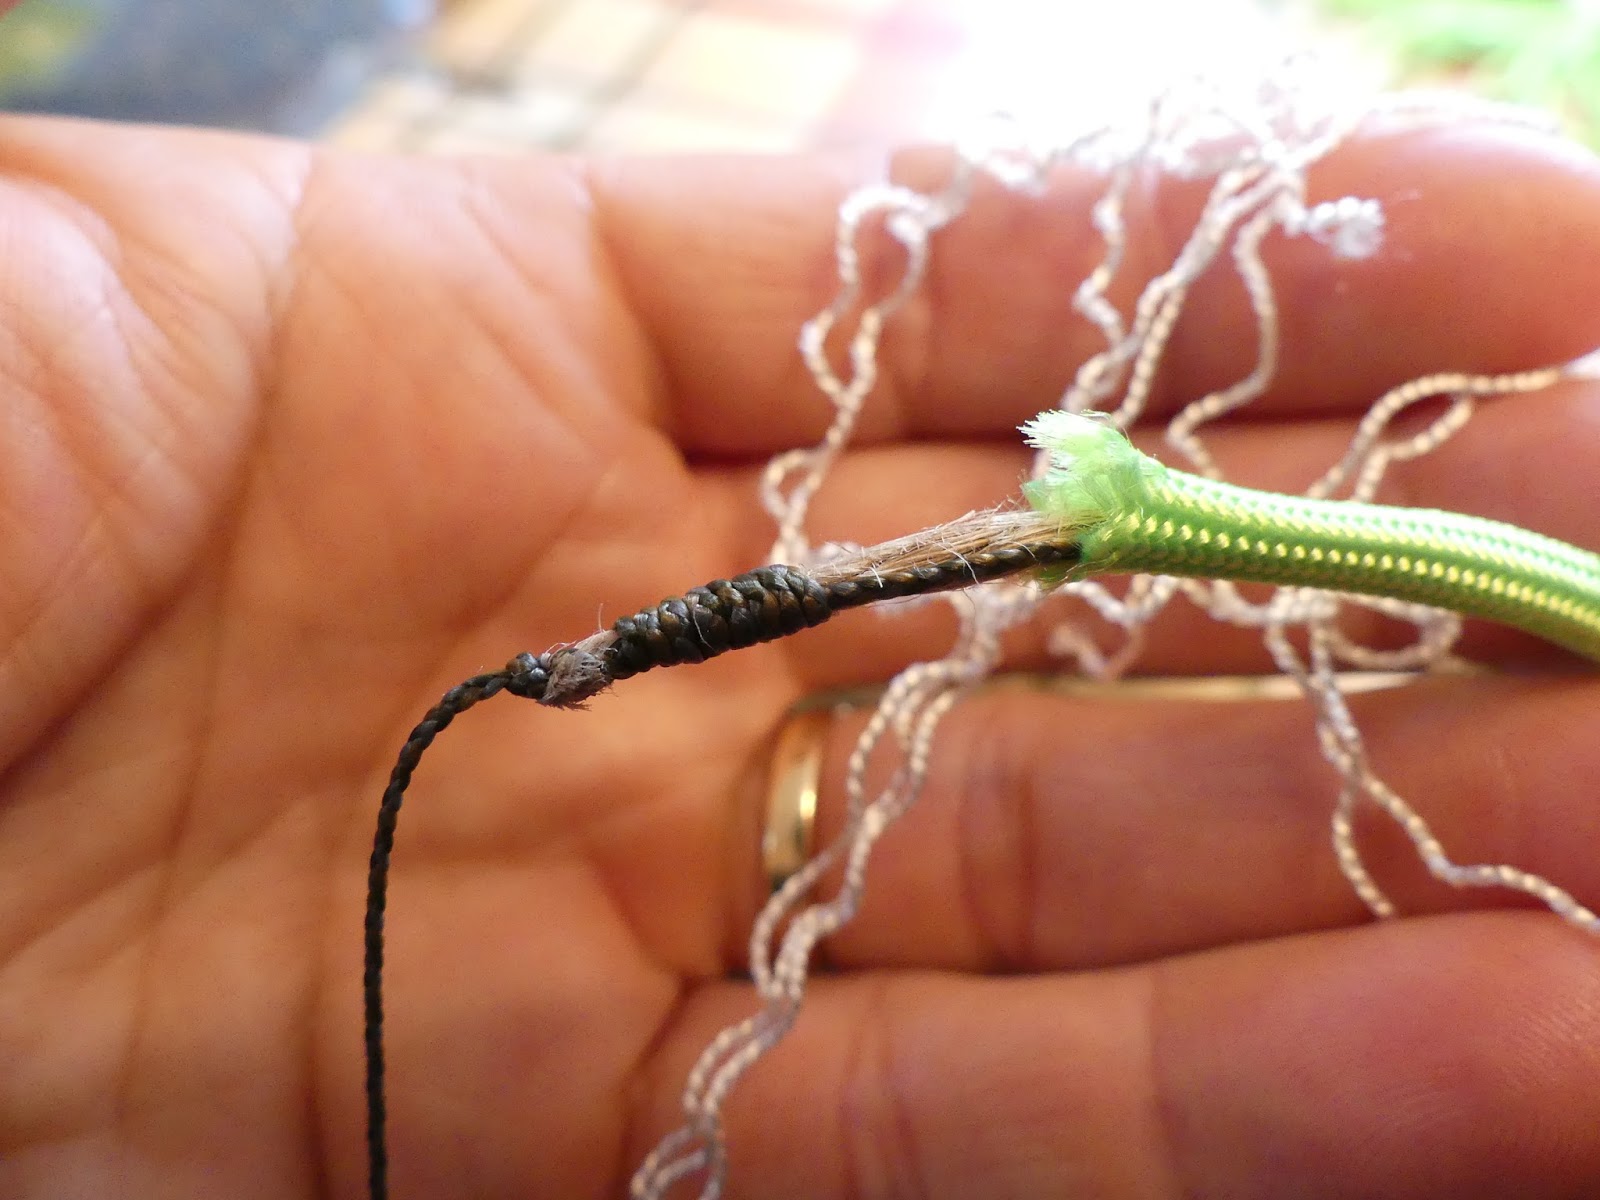
I tried making my own version by removing some inner strands and then threading some natural jute string (which takes a spark well) using a similar technique to the wallet strap from earlier and it is possible but I found that it made the inner strands bunch up and often come out. Firecord is more expensive than regular 550 cord but equally you don't need much. 

Next on the list is nanocord which isn't paracord 550 in the true sense. It is also nylon but it has no internal strands, has just short of 40 pounds breaking strain, and is around 0.75mm thick (the above picture has some regular paracord 550 in it for comparison). I have still included it because it can still be utilised into a decent amount of cordage when made into a bracelet (or similar) using the cobra weave, it is worth pointing out that it is a bit fiddly to use like this and would benefit from being anchored. 

You'll need just over 10 inches for every inch weaved (assuming it's round a loop of nanocord). I used some of this to pull the jute string through the above project and you can see it is pretty much the same diameter as the fire cord inner strands. As well as bracelets it could also be used to whip small diamtere rope ends and as an all purpose length of cordage that doesn't have the bulk of paracord 550.  I used some of this to pull the jute string through the above project and you can see it is pretty much the same diameter as the fire cord inner strands with slightly less breaking strain.


Finally we have nanocord's big brother microcord which again isn't paracord 550 and is similar in all ways to nanocord except it  is 1.12mm thick  and has a breaking strain of 100lb which is a good trade off against paracord 550 in terms of size (the 550 refers to it's breaking strain). Again it's multi use so is included because of this fact. It is less fiddly to weave than nanocord but again would benefit from being anchored. You'll get around 10 inches of weave per inch and isn't a million miles away from nanocord in that respect.


Wednesday, 3 September 2014

More paracord knitting


If you are swinging by this blog because you have seen it mentioned in the survival paracord bracelet article in Bushcraft and Survival Skills magazine then thank you very much for looking, I hope you find something of use. If you are swinging by anyway...thanks as well for looking! Indeed many thanks also to Ian Nairn who did the bushcraft on a budget article and felt that it was worth mentioning this blog, not sure I'm worthy.


I recall Ian sending me some pictures of some bracelets he'd made using my paracord article which appeared in the magazine's  issue 38 edition May/ June 2012 and he was hooked which is often the case with 'paracord knitting'. I often say to those that I show that I'm hooked and I'm taking them down with me. Flippin' Nora, that article was over two years ago!

I've also done a similar two part article for Scouting magazine and the Scouting website, the Scout Association's Outdoor Adventure Manual and latterly I did a fairly comprehensive paracord  blog  here which focused on maximising the tying and usage of the basic cobra weave. This page presents some other easy to do weaves to make bracelets, woggles and key rings like the original one I did and to provide a link to the big paracord blog article for anyone swinging by.

Right, let's kick off with an easy to do bracelet...The jig you can see in the background is explained here


Before I start I think that the clip and the protruding paracord looks like a catfish...jus' sayin'. Load the clips as per the instruction on the other page but put an extra turn in as shown above. This weave is about 4" to the 1" so not as good as the  1 foot to 1 inch of the cobra weave.


 Take the lengths under the bits that are between the clipped ends and then round and over the top.


Once the ends habve been crossed over, take them under the suspended lengths between the clips. The trick with this one is to keep a slight tension on the working ends and the etxra turns through the top half of the clip help the rigidity too.


You will soon get going and you can maximise the turns and neatness by cajoling the turns in to place.


This bracelet is started by looping one length as shown. Each inch of this knot is made by about six inches of cord (that's 15cm to make 2.5 cm to the younger demographic). Now align them and wrap the end of one length around itself three or four times (from right to left in the pic).


Push the end of the length through the loops and fashion a knot like the one shown (Google a Jack Ketch/ Hangman’s knot). It doesn't have to be anything flash as long as it is neat, secure and points the cordage to the left...Trim off the end on the right of the knot and seal the end with a lighter but beware, paracord is nylon and burns hot and needs a moment to cool down. Now tie both ends of the paracord with a doubled up overhand knot in the ends (a double version of the ‘conker’ knot for any knotting Luddites out there) and check it fits through the loop fairly snugly because this is what secures it and obviously it needs to hold.


So that’s the preparation now completed, onto the paracord knitting itself. First, make a loop in the light green length as shown (over then under to form the loop). Now push a loop of the olive green paracord through the light green loop from underneath.


Get the olive loop to about the size shown and then gently but firmly pull on the light green length. And on it goes. Each time you pass a loop through you then pull the slack out of the first one.


Once you get going it should come together quickly. Once you have reached your desired length, push the end of the paracord length through a loop instead of a loop through a loop. Pull both ends together and tie the doubled up overhand knot back in and seal the ends of the paracord with a lighter.


The finished bracelet. 


This design is also suitable for making a smart looking key ring. The method is the samed but it is started off by tying the paracord to a split ring, the start of which is shown above.

The knotting needed to make the chunky key ring below will be recognised by Scouters as the friendship knot used to in a woggleless scarf, although if you have paracord there shouldn't be a need to be without a woggle! 


Start off with two lengths of paracord formed into a cross, the piece running top to bottom (the grey length in this picture) must be on top. Cross over the (orange) lengths running from left to right as shown. Take one of the grey ends (in this case the lower one and cross it over the first length of orange paracord and then under the second.


And repeat the same process with the upper grey length and then pull the knot tight, but not too tight at this point. As previously stated you basically form a friendship knot which is also a type of knot called a sennit which can also be fashioned from a three length/ six strand combination.


Repeat the above steps again and then turn it over and pull the orange paracord at the bottom a just enough to be able to carefully add a metal split ring. Once the split ring is in place, just keep going until you reach your desired size of key ring or start to run out of paracord. Snip the ends close to the body as usual.


To finish it off, as usual, take a lighter and gently singe the cut ends and squash slightly to melt and secure them with a rivet like finish. This makes a nice chunky key ring. 

And on the types, styles, widths, variations go. I'm sure I'll put some more designs up at some stage in the future but to be honest a lot of designs out there are either complicated or make really wide bracelets and to my mind the standard bracelets are big enough on the average wrist, although a super chunky bracelet will give you a massive amount of usable cordage...once you've unpicked it!