Upon a morning visit to Facebook I was greeted with a 'flashback' that the site provided me reminding me of the fact that I'd posted about the imminent release of a publication called The Outdoor Adventure Manual 2 years ago (4th April 2013 to be precise).
Whilst not a bushcraft publication in its entirety I was lucky enough to be asked to help write stuff for this publication which was a joint collaboration between the Scout Association and Haynes publishing (famous for the car manuals). I’ve written articles for Scouting magazine and the Cub supplement (whilst it lasted for) for around 18 months/ 2 years (it started by accident) and whilst on a visit to Gilwell HQ to see one of the magazine editors I was approached by The Scout Association's Creative and Brand Advisor Chris James, had a meeting with him and I was on board with several other scouters!
Chris asked me if I could recommend any other potential writers, I said ‘What about if I could get some professional outdoor instructors on board to write?’, Chris meant scouters but left it with me. A little bit of networking later, including email, face to face, the Bushcraft Show and Facebook (a positive use of a much maligned media) and the following were on board:
Scouter Terry Longhurst also asked Jon Mac spooncarver, kuksa maker and all round woodworking clever chap (http://spooncarvingfirststeps.blogspot.co.uk/ ) if he would do a ‘How to’ on spoon carving too. The Scout Association also asked the Red Cross to do a big piece on first aid. I also did the draft illustrations for Tristan's and Joe's articles and started a Facebook page for the publication that is still getting likes today..
It started out with Haynes wanting articles into Chris in a very short window, and then once it was all gathered there was a large period of relative inactivity until Haynes suddenly asked that all the articles were proof read. I volunteered and on one occasion I sent an email back having checked one lot as another email load came in! This short editing window did mean that there were some recommendations made that couldn't be acted upon due to the timeline.
Despite some faults I felt that a book knocked up with all contributors in relative isolation didn't come out too badly and it had several positive plaudits at the time. I’ve already thanked the guest contributors but I feel obliged to thank them again…every one of them to a man readily agreed to contribute to this project and it’s very satisfying to know that they all feel comfortable aligning their name to the Scouting brand.
I managed to get an article in the John Lewis internal weekly magazine and my local paper (with a potential audience of 100,000+). I've also included a basic shot of the two articles that I've mentioned.
And here's a picture that Jon Mac posted on his Facebook page and I just had to share it. He was so pleased to be included in the above book that he asked his postie to pose for a picture with it! How refreshing. Have a look at his blog http://spooncarvingfirststeps.blogspot.co.uk/ . Bushcraft & Survival Skills also reviewed the book in a past issue too, once in the in the news section and also in the book review section and I thought the review was very fair. I think this book has pushed the outdoor agenda more than any other Scouting publication and to my mind the next step is a book called 'Scoutcraft' in which the outdoors focus is skills and (bush)crafts that B-P would recognise. I'm also pleased to say that it is the very first book in the Scoutmastercg website list of Great Books For Scouters and said the following:- 'Published by Scouts UK with a forward by Bear Grylls The Outdoor Adventure Manual is packed with practical Scout skill tutorials; tents and camping, fire, food and cooking, tools and gadgets, knots and lashings, navigation, first aid and survival and more. Skills are explained step-by-step with photos and illustrations that really bring them to life. I’ve read a number of ‘how-to’ books that I suspected were written by people who had not actually tried out what they were describing. The Outdoor Adventure Manual leverages the know-how of many experienced authors to provide practical instruction that is inspiring and easy to follow'. And whilst on the subject of Scouting, if you are a bushcrafter, why not volunteer with your local group with the occasional outdoor activity? A lot of groups have loads of kit, a place to have fires (do you?) and a willing audience, even simple stuff like charcloth leaves them spellbound.
Over the years I've had several different bushcraft experiences with the Scout Association; I helped Bushcraft and Survival Skills magazine's base at Gilwell 24 to cover Bear Grylls' investiture as Chief Scout for an article (which appears in issue 22) and was one of the three founding Scouters who started the bushcraft base off at Gilwell 24 the following year (the others being a former Bearclaw bushcraft school instructor and the founder of Wood Sage). I've also done articles for Scouting magazine and the Cub supplement (when it existed) and I was a major contributor to The Outdoor Adventure Manual, not just in terms of articles but also 'recruiting' the majority of the guest instructors who contributed articles. I got an email from a lady called Rachel, a member of the Commercial Partnership Department, based at Gilwell in early 2014 to tell me about a hush hush plan to link the Scout section's Survival Skills badge to a new sponsor, namely Victorinox. This would also tie in with a 2015 badge overhaul (including the Survival Skills badge criteria) and would I be interested in giving some input to this project concerning knife usage. I was flattered but suggested a handful of Scouters who would be able to deliver a more comprehensive information package than I...Whilst I know how to use a knife competently I felt honesty was the best policy with something as important as the two brands the information would be linked to so that's why I respectfully declined.
To my surprise Rachel emailed me back some time later and asked if I would be interested in coming to a meeting with her and the Victorinox team at their flagship shop on New Baker Street in London with the view to discussing some content for the Survival Skills badge. Unlike the knife usage request I accepted this invitation as I felt I could at least put some meat on the bones as a starting point. I was sent the revised badge requirements and set about brain storming them. I've placed a table of the old and the new requirements at the very end of this blog page if you are interested in seeing them.
I headed to London for a morning meeting in early September and made my way up to their meeting room on the third floor. As I was early I was offered a rather fine coffee and shown into the plush meeting room which gave me a chance to get myself prepared and have a cruise around the many cabinets filled with Victorinox products. I'd done some homework on the new badge content and in for a penny in for a pound, I'd knocked up an idea for an exclusive Scout Association knife but more on that later. Rachel arrived soon after and, along with a lady called Suzanne from Victorinox (their marketing manager),we started the meeting and yes I did get a second coffee!
The meeting was very productive and was a combination of two organisations talking turkey with me chipping in thoughts, suggestions and props in the appropriate places. Doing the content homework beforehand had really paid dividends because it showed that there was a lot of suitable Scout Association content available to use and if needed, Victorinox had a large catalogue of usable images too. Victorinox discussed calling the penknives pocket tools which I suggested wasn't necessary because a) everyone knows them as Swiss Army Knives (SAKs) and b) I felt that there was no need to no call a knife a different name (too much hysteria out there). I also introduced them to the phrase Everyday Carry (EDC) which of course refers to a blade that is legal to carry.So the bones of the package were in place.
We convened the meeting just before dinner with plenty of follow up work to be put in place. There are those that aren't keen on such badge sponsorship but this small exposure to such a project showed me not just how much work goes into such a project but how much toing and froing happens.
As I mentioned earlier I'd done a bit of knife homework and suggested a usable combination of tools and handle design already available, plus the possible addition of new tools (tick tweezers, ferro rod and scraper) to produce a Scout specific knife design, not unlike the branded Duke of Edinburgh ones. It was favourably received but sadly this wasn't viable as the factory producing the knives is at permanent capacity. As there are production figures available on the internet it won't be top secret to know that 120,000 units are made per day so there is no spare in the system to consider it. Shame. I had a quick tour around the shop before I headed home and it's surprising to see how much more Victorinox do other than the iconic knives.
Rachel and I met up a week or two later in a meeting room at Gilwell to review the discussions in London and see where we were at. One thing that I'd mentioned all along was that whilst there would be uses for a pen knife within the badge, most of the knife work would really have to be done with a fixed blade. To make sure that pen knives would be a feature I devised several how to projects that could safely be done with a folder and would also be usable within the demands of the badge. I also took along a copy of the Outdoor Adventure Manual for reference, my copy of the meeting notes, my 'homework' notes and some more props.
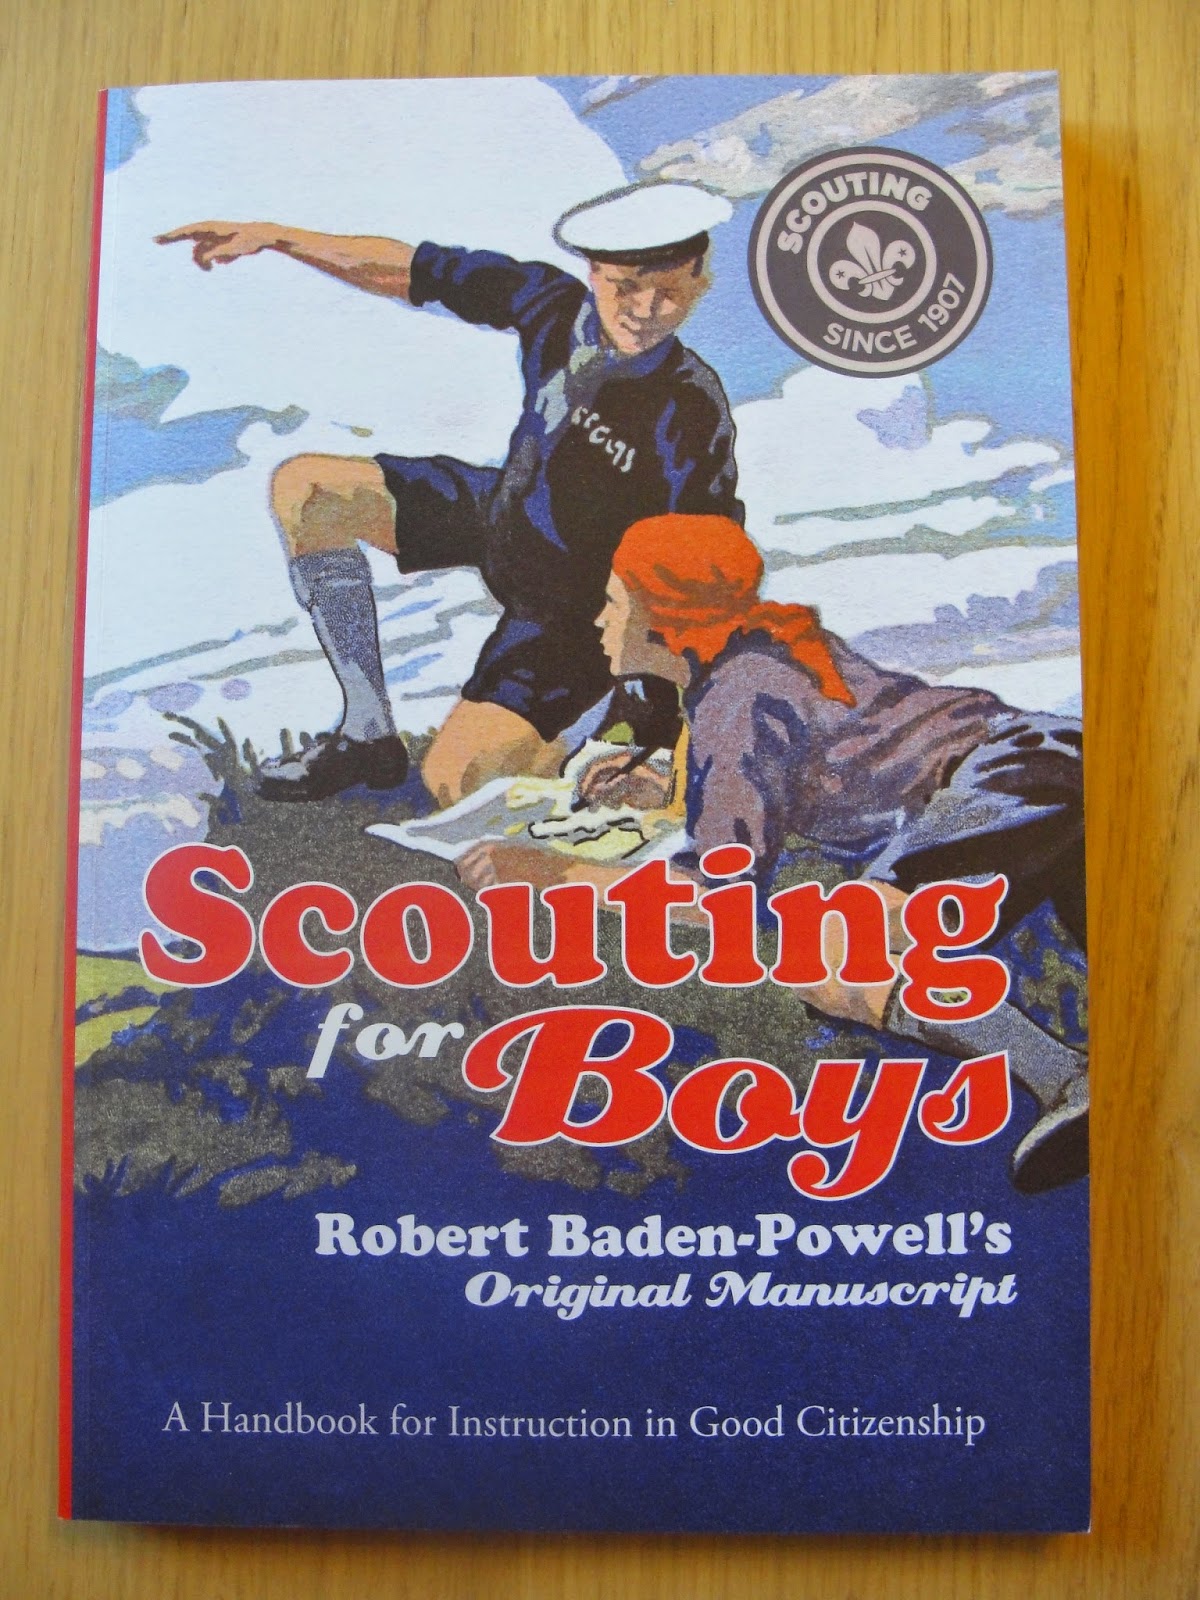
I left them with not only some suggestions of things can could be done for most of the sections but also a list of questions about the badge where applicable. Before I went I managed to catch up with a guy called Chris James, the individual who oversaw the Outdoor Adventure Manual project. He had a spare copy of a revamped Scouting For Boys copy he let me have and I was really pleased to see that Baden-Powell's grandson had signed it inside.
The Gilwell email screen grab.
The district email screen grab.
In late November I had a couple of emails arrive; one from Gilwell national HQ, and one from my scouting district team informing me that that change was afoot with the badges...I internally chuckled myself a little "I already know!". This page appeared a little later in December as a teaser which announced the sponsorship deal and tells the viewer a bit about the company.
And this was a screen grab of the page pdf I was sent which was for...and now is in the February/ March 2015 Scouting magazine pullout called Get Active! I was sent it in advance to run the rule over with the three how to series appearing online.Not surprisingly Victorinox have a rather stylish full page ad in the main magazine for their Huntsman Swiss army Knife.
I got an email from Rachel in early January asking if I was free to help oversee a Gilwell photo shoot with some Scouts on a Sunday in the same month. I was and asked if I could do a Saturday overnighter with a DD tarp and hammock set up which was duly agreed. I also found out that fellow Scouter Terry Longhurst was also coming which would be useful to help ensure correct procedures and practices were followed. Terry runs Bushscout who you may have seen at anything from Gilwell 24 to The Bushcraft Show and he has also, at the time of writing, just completed the Woodland Ways Bushcraft School's two year course, the Woodland Wayer.
For those that know Gilwell I set up a small camp in the trees that have formed a sort of circle that are on the edge of the Orchard as I thought it would make a good area for photographs. Whilst there I realised that this was actually my first solo camping night so another thing ticked off the list.
As you can see I made myself at home and once set up quickly and when it came to bringing props I started out selecting stuff and then ultimately just stuffed loads of possibly usable gear ('the props') in the car. Once set up I almost inevitably got a fire going, initially to cook on and to keep the cold at bay, but we would also be needing a fire the next day for pictures. I did get through a fair bit of fuel as it was a bit nippy.
As the mobile quartermaster store (the car) needed to be close at hand due to all the kit I indulged myself food wise on the Saturday by having a sirloin steak and assorted sides. Anyone can just survive!
I'd set a camera trap near my camp as there was a bridge on the edge of the orchard that led to some woods and it seemed a good place to set it. I was lucky enough to capture a fox and some rabbits...the former past whilst close to my camp whilst I was cooking the steak.Terry spotted a fairly fresh set of deer tracks on the Sunday morning but it turned before it got to the trap.
Rachel kindly added me to the breakfast list in the White House at Gilwell on the Sunday morning so I rather enjoyed an early morning cooked breakfast to start the day off. It would have been nice to do myself one over the fire but it rained in the night and despite the fact that I'd turned two big logs over the fire to keep the area dry, doing breakfast was time I didn't want to use as those involved would be arriving from nine in the morning. As folk arrived an impromptu planning meeting started (including Susanne from Victorinox and Kevin Yeates who is the Scout Association's head of creative
content. The cameraman's kit was plentiful and expensive looking!
A couple of shots from the day's shoot. the Sunday weather was cloudy giving way to bright sun (I took one for the team as it rained on me in the night!). Terry and I took them through a few skills and setups before and after dinner with how to light a fire and building a tent from a tarp being two of the skills that I did. I simply used the DD tarp that I'd slept under to construct it with the Scouts (link here).
The photoshoot finished up in my camp with various impromptu shots being taken. I'd started the Sunday by cooking up a bacon and sweetcorn bannock for the Scouts and their leaders to try. I'd also pre-made a sweet sultana bannock mix for the Scouts to have their picture taken with. It was getting cold in the sun's twilight and it was only when I tried to form the dough into a bannock shape that I realised how cold as it wasn't playing ball. I got it sort of shaped but squashed a lot of the fruit in the process.
The above picture shows the bannock being cooked...Just before the Scouts then chucked a load of wood on the embers bless 'em. I kept a close eye on it and still got a win however and it disappeared as quickly as the first. You may well see shots of this bannock in future issues of Scouting magazine...
Both Terry and I had come pretty tooled up with kit just in case it was useful and I'd quickly knocked up a pot hanger set the previous Wednesday but we didn't get round to using it as a prop which is a shame because it would have worked well within the photo shoot brief. Better to have and not use that the other way around I guess...You can see the actual pot hanger hooks being utilised as a camp tidy with the aid of some paracord 550 back up the page. Apparently the UK scarf I'm wearing is the one that Kate Middleton wore in her Scouting photo shoot, I shared this fact on social media and got christened the Duchess of Gilwell. Hmmm. We both felt that we'd not really got a lot of skills demonstrated but Rachel said the shoot was successful because you have to factor in that there are different people looking to get different things out of the day, plus the photographer will want to shoot multiple images of not only the same shot, but the same shot with different Scouts in and can only shoot one skill at a time. We've also suggested that once the 1500 pictures are whittled down (no pun intended) that Terry and I take a look to see that they are all fit for purpose.
And this is what all the fuss is about; a little cloth badge the size of an individual portion jam jar lid which henceforth is the Survival Skills badge sponsored by Victorinox. It's been an interesting and enjoyable journey for me because I've seen the other side of a badge sponsorship deal and not only all the work that goes into it but the different facets that go to make this a wrap. So I guess that's job done from Terry's and my point of view...Remember to look out for Terry's Bushscout stand at a show near you! Here is the first of the sheets that Terry and I have helped with, along with additional text by Pablo, and words and text by Paul Kirtley. The others can be found here.
I do rather like paracord knitting and I've been lucky enough to do some articles for Scouting, Bushcraft and Bushcraft and Survival Skills magazines on the subject. I know that the latter one prompted a well known outdoor shop to stock paracord due to the increase in enquiries they received so I'm not the only one...Some of the images used are ones I did for the said business.
Working with paracord can be very satisfying and I must say that I take no responsibility if you read this blog page and get a craving to 'knit 550'. 550 refers to the tensile strength of 550 pounds that this cordage has, if I recall correctly the 7 inner strands are 50 pounds each and the outer sheath 200 pounds but don't quote me on it.
In the past when I did paracord stuff with the Cubs I could show them then go '5, 4, 3, 2,1' in my head to the moment when I hear 'What do you do again?', 'I didn't see', 'I can't do it' and so on. I think folk get baffled because you are tying what looks like a complicated knot around some cordage but essentially you are only tying a simple overhand knot (the one that secures a conker on a string) around two straight lengths of cordage. There is further tying explanation further on. These bracelets and so on will give you a lot of workable cordage when pulled apart and the outer core and inner strands are used. Some of these are a genuine outdoorsman's friend, others are offspins with something more of a novelty value.
I've also used several links from the animated knots website to help with the knot tying in this blog page. Your basic pieces of kit to make anything are the paracord, sharp scissors and a lighter for sealing the ends, this is explained further on. Please be careful when using lighters and melting paracord. The metal parts of the lighter can get hot and burn (along with the flame obviously) and the paracord is made of nylon and can also leave a nasty burn if it gets on the skin when heated. Use push button lighters as the manual ones really hurt your thumb after a while.
Basic paracord bracelet.
Measure a loop of paracord around your wrist and secure with an overhand knot (to make an overhand loop). Make sure you can get a couple of fingers within the loop when on your wrist as the internal circumference will reduce slightly as you weave more paracord onto it. Cut the length of paracord to weave around the wrist loop allowing 1 foot for every wrist loop inch (about 30 cms to 2.5 cms in new money) plus a little over. Better to be over than under as it's cheap as chips and you may end up desperately trying to pull short ends through the weave with thin pliers to complete! Worth knowing but equally worth having a pair to hand.
You can start from either side and in this example it's started from the top. Find the middle of the chord and line it up with the wrist loop. Fold the top orange length over the wrist loop as shown about half an inch from the left hand side of the olive wrist loop.
Now take the lower orange length and place it over the top of the upper length as shown.
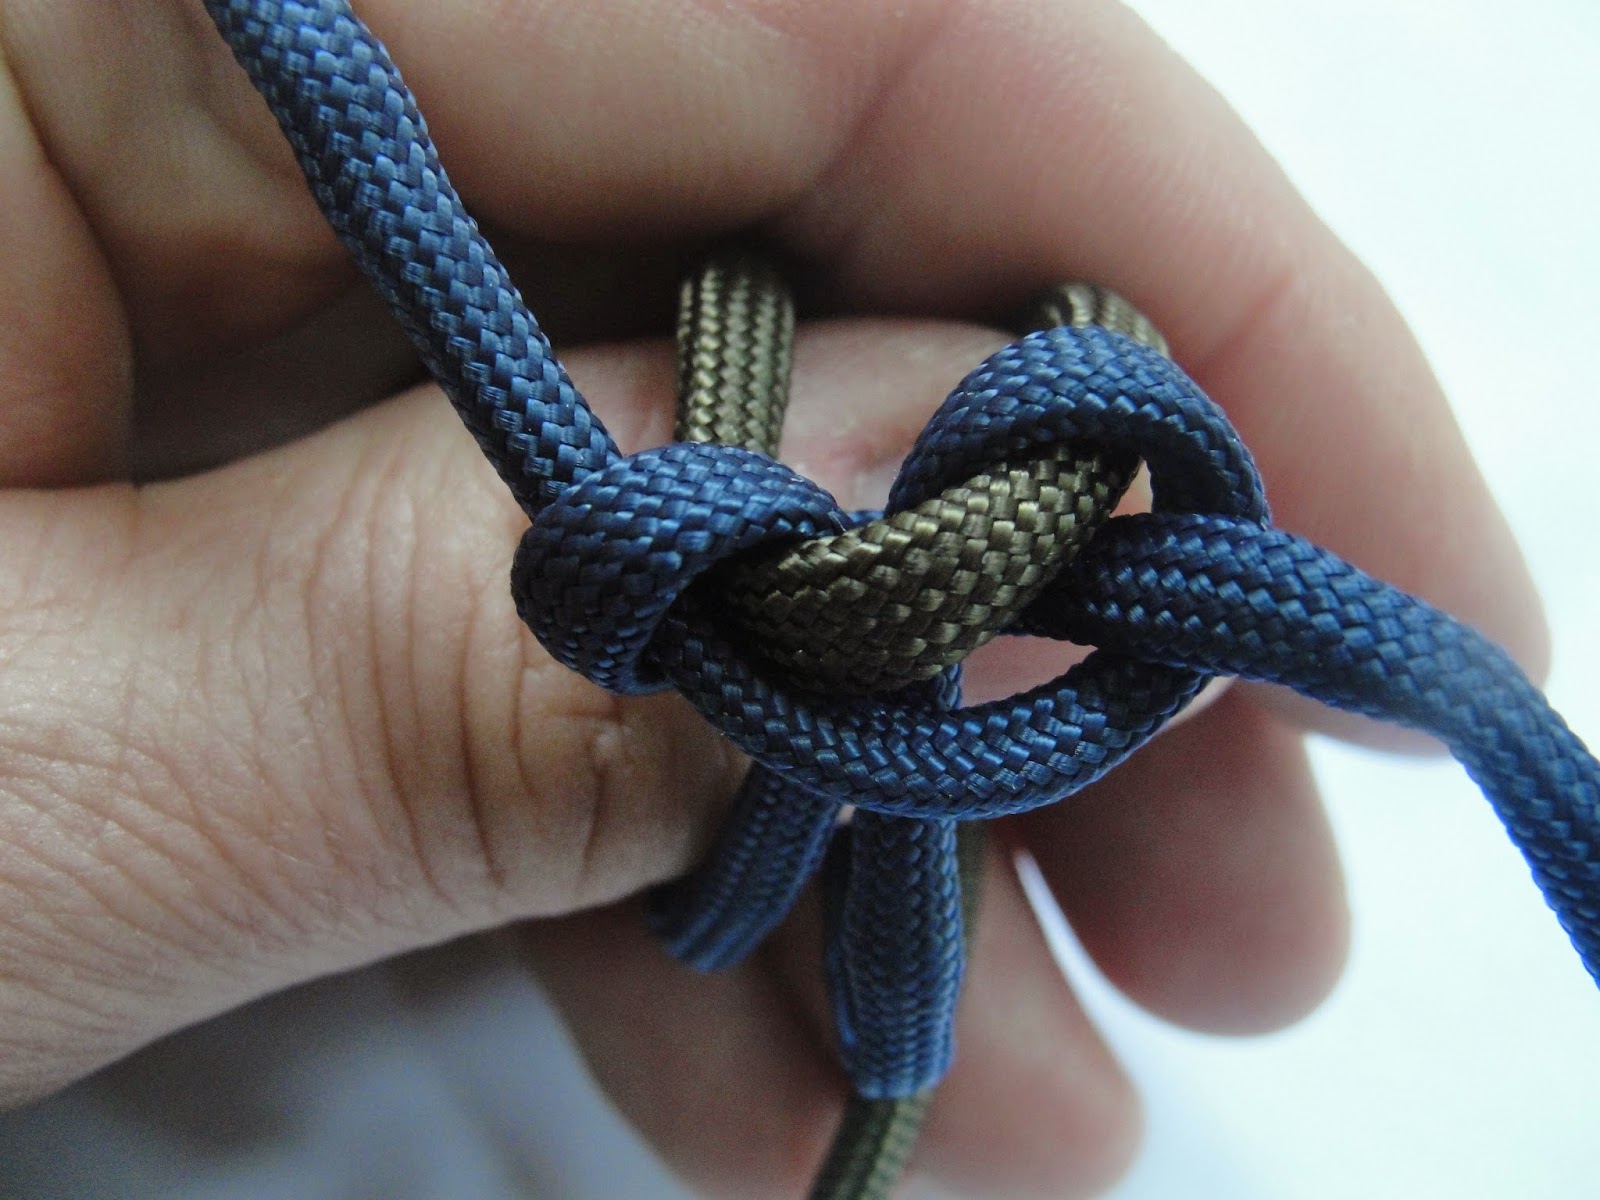
Now take the lower orange length and run it underneath the olive green bracelet loop and out the side, this is called the cobra weave but if you analyse the knot itself without the olive green loop in place you have simply tied an overhand knot. take this opportunity to check that the knot on the wrist loop will snugly fit through the end loop.
It is now a case of repeating this process alternatively from both sides so we start with the lower length this time being placed over the olive green wrist loop.
Place the upper orange length over the lower one.
Take the upper orange length, run it under the olive green loop and out the other side. stop and check that the knot will fit snugly through the loop at this stage and re-adjust if not.
Once done, gently shuffle the knots together and and re-tighten if necessary. The idea is that this bracelet is giving you a lot of cordage stored in a small area so the more cobra weave that can be done on the wrist loop the better.
Repeat until it is impossible to squeeze any more cobra weave onto the olive green wrist loop...
Place the overhand knot through the loop to wear it. How to finish and seal.
Paracord needs to have the ends sealed (whether they it is made into something or not) as the ends of the outer sheath will fray and the inner strands can pull out. There is more than one way but I use a lighter to simply melt the end of the paracord gently, ideally without the flame touching the end. Once the end appears to melt quickly use the body of the lighter to gently squash the end and form it into a neat rivet like end, this is especially important as a slightly squashed end will help secure it in a bracelet etc and stop it unraveling easily. You can also do the last two or three cobra weave turns slightly loose and use thin pliers to pull the remaining length back through the weave on the inside. This hides the rivet like seal inside the bracelet but it's a pain to do!
As previously stated, please be careful when using lighters and melting paracord. The metal parts of the lighter can get hot and burn (along with the flame-obviously) and the paracord is made of nylon and can also leave a nasty burn if it gets on the skin when heated. Use push button lighters as the manual ones really hurt your thumb after a while.
Clipped paracord bracelet.
For this type of bracelet you will need to know how to tie a Larks Head (there is a hot link to help with tying further on).
A clipped bracelet still uses the cobra weave but instead of using a large knot and loop to secure it you use made for purpose clips (which are more secure). It is roughly the same length of paracord needed as a basic clipped one but instead of two pieces the length that forms the overhand loop that goes around your wrist is now part of one continuous length which enhances the overall length of cordage available to the wearer.
Once the length of paracord is measured find the middle, double it up and feed the loop through one part of the clip (the 'female' part in the picture above). Tie a Larks head (cow hitch) and then thread the two ends through the other part of the clip (the 'male' part).
As with the basic paracord bracelet start the cobra weave off...
Once you've done a small amount of weaving check that it will still clip around your wrist comfortably and adjust if needs be.
Pull tight, cut the remaining paracord and seal it neatly with a lighter like the previous bracelet.
Making a bracelet during some Frontier Bushcraft course down time.
Multi colour paracord.
Some paracord bits and pieces can be made with more than one colour and one way of achieving this is to fuse two pieces together. As per sealing the ends, melt the end of two pieces close together with indirect heat and then quickly put the lighter down (on a surface that won't scorch) and gently and carefully press the two ends together. If you press too hard the ends will bulge but any bulged bits are often possible to snip off when cooled.
On a simple looped bracelet the colour you cross over first will be the central, dominant one and other will form a line down both sides of the weave.
Clipped bracelets are similar but please note that getting a paracord seal through a clip can be hard, it may be worth pushing the two individual lengths through and then sealing them afterwards. You need to line up the seal as shown above to face the inside of the bracelet so it can't be seen.
The same rule applies to how the coloured paracord will lie. You can also use this method to introduce a third colour between the two parts of the clip and then weave a two colour length onto it (like a simple looped bracelet but with clips). Whichever bracelet you make do check that the heat sealed ends are well secured.
As previously stated, please be careful when using lighters and melting paracord. The metal parts of the lighter can get hot and burn (along with the flame-obviously) and the paracord is made of nylon and can also leave a nasty burn if it gets on the skin when heated. Use push button lighters as the manual ones really hurt your thumb after a while.
Paracord keyring.
For this you will need some sort of fastenable clip or metal split ring. Again the cobra weave is used to form the key ring body and as it's an inch for every foot used you'll need the required length of the key ring, the cobra weave plus a little over for the knot.
The knot to start a key ring off is easy. It is easier if you add a split ring into the loop before you tie it as shown. To make this knot easy form up the rhs of it as per the picture above left and you are basically mirroring this half to finish it. Excuse the rather phallic appearance of the pre tightened knot! How much paracord to make the knot? Roughly 4-6 inches depending how tight you pull it of course.
As well as robust key ring fobs this weave makes very durable (and potentially useful) zip pulls on rucksacks. Handy if you have cold hands. If you fasten a split ring with a Lark's head knot where the clip is, and secure the top knot around another split ring and weave it becomes what is known as a soloman bar (there is a green example in the very last picture on this page, well the left hand side one), As with the others, cut the waste and seal. Two small key rings linked end to end yin and yang style with a lark's head can be used to make the next thing...
Paracord woggle.
These are arguably the fiddliest paracord project to do so far, at least initially. Using a stick about the diameter of a broom handle (or use a broom handle!), this project will need something like a 54 inch piece.
Find the middle of the paracord, form another lark's head like you did with the clipped bracelet around the wood. Carefully tension the paracord so that it's firm but not tight around the wood...
Now start to form a reef knot loop as with the key ring. This is the slightly fiddly part because it needs tying whilst on the wood...
Once completed it can be gently slid off the wood which makes the subsequent cobra weaving a whole lot easier. Continue to do the weave...
As with all the previous weaves, neatly cut and seal the finished woggle off. The above rhs picture is what 30 odd lengths of 54" paracord with the lark's head and first cobra weave turn in looks like. Once you've finished it off wear it with the final bit of the weave at the back.
As mentioned earlier, if you attach two key ring weaves to each other yin and yang style and then cobra weave up each one you'll make a two coloured woggle. Am I going on record with what I think is the ideal internal diameter of a woggle? Not likely!
Elastic hair band alternative.
As an alternative it is possible to make a bracelet or woggle using an elasticated hairband. Simply subsititute the loop that goes through the middle for the hairband. The bracelet at the top has a blue and a white one running through the middle.
Basic weave variations.
In the above picture from left to right. A buckled bracelet (made small for the picture) which shows the set up for a standard clipped bracelet but then the paracord is run back through the first buckle again to add extra usable length to the bracelet.
The bracelets can look a bit chunky on smaller wrists but can thin down a bracelet by either gutting the inner strands and/ or lining the paracord lengths on top of each other instead of side-by-side. Stripping the paracord will of course reduce the usable length of the bracelet. There are a vast range of beads, buckles, clasps and bolt ons to be had when making paracord stuff, this compass is just one such item. It has a slot underneath and you weave up to the compass, pass the ends through the slot and continue weaving.
This picture shows a few alternative cobra weave materials, raffia with African beads, beachcombed fishing line and leather.
You may notice a peach coloured thread running through the fishing line bracelet, this can be achieved with paracord too. Simply measure and cut a piece which is about four inches longer than the area the cobra weave will sit on. have a couple of inches poking out each end. Start cobra weaving with the extra length within it but don't do the initial weave too tightly because you need to use a pair of thin pliers to pull the 2 inches through the loop and down the back (inside) of the weave. Tighten the cobra weave and then seal the end of the strip. Finishing is pretty much the same, leave the last bit of weave a little looser and poke the other 2 inch bit down the back, seal as before and then work the weave tight.
And after all this, consider using the weave for everything from thin straps on binoculars to a spare length on a the lifting loop of a rucksack. Believe me, if you have a strap like a cheese wire on any binoculars you own, this will make a great difference to their comfort. It also make great bootlaces too.
'Dropped stitch' cobra weave alternative.
Start with standard cobra weave 'stitch' but then no! No more standard stitch!
Do a dropped stitch by passing the paracord over then under the strap paracord loop and then finish as per the usual weave. Repeat left and right.
Personally think it works better with contrasting colours to show off this handsome weave.These are one of my favourite combinations.
Paracord people.
These little people are an easy variation on the cobra weave and make a fun key ring. Form a small overhand loop or Chinese button knot...more on these later) in the middle of a piece of paracord about five inches long, insert a split ring if it is to become a key ring. Tie an overhand loop at the end of both lengths, this forms the head and legs. You'll see that 2 inches of weave will give him slightly small legs, I used a spare piece that was 27" long with 4" of waste.
Start from the top of the leg and do the cobra weave up to the neck. Don't cut the excess off at this stage.
You need the excess to form the arms and hands. Tie an overhand knot in each piece of excess until you have the desired (and equal) arm lengths sorted. Cut and seal.
If you use fairly two close colours it's possible to use the heat sealing technique to add different coloured legs, the seal is hidden in the weave which needs to be tight to help hide the joints.
Super Cobra weave.
As if a repeating overhand knot hasn't got a macho enough name, along comes the super cobra...essentially a second layer of cobra weave paracord over the first one, either using the same bit (allow more for the weave as it is going around a thicker base i.e. the weave as opposed to two pieces of paracord). or a new piece of a different colour. The former gives you longer usable lengths than the latter of course...It makes whatever you are making a thicker and weightier but remember that it will decrease the internal diameter of a bracelet or woggle even more than a single weave so bear this in mind when doing your measurements.
This key ring (the making of which is covered earlier on) uses the super cobra weave with the paracord in two parts. This particular key ring is three inches long.
Once the knot is tied to make the length in the orange paracord around which the weave goes, insert a length of paracord through the knot as shown (in this case yellow). Once done start weaving the orange lengths.
Trim up and seal the orange paracord when finished and then start weaving the other inserted yellow length up the key ring body. Cut and seal the ends when complete.
A shot of a 'how to' I did for a shop
Chinese button knot.
This is a rather impressive knot that you can use to make a superior paracord bracelet and heads for the paracord people. It looks complicated but because it's a symmetrical knot there are several repeated moves. I've put letters on some of the key parts and the knot itself will take approximately 12-15 inches of paracord. There's also a brief video below too.
Loop a length over your index finger and then put a loop in the left hand length as shown. Make sure it is the way it is shown and not the other way around.
Take the loop and bend it around to meet the left hand length (A). It bends round anti-clockwise, as opposed to being bent over like a springing mousetrap. Secure the loop with your left hand thumb.
Gently ease the length A over your left hand thumb and then grab the lower left hand length (B) and feed it under the right hand length (C).
Push B underneath A and straighten the knot out so that it is symmetrical. It should resemble a number eight in shape with a diamond shape in the centre (D). The letter R represents the 'ring' formed around your finger.
This is the reverse of the knot to show the 'ring' (R) more clearly. Take length C anticlockwise, past R, under the knot and poke it upwards through D. Gently pull it to take up the slack.
Nearly there! As I previously mentioned the symmetric nature of this knot is your friend. I pull the knot off my finger, turn it through 180 degrees and slip it back on my finger to repeat the previous step but this time length B goes anticlockwise, past R and underneath the knot into D
Now if it's not gone quite right, it happens...If you have got it right, you can spend a brief moment feeling a bit smug that you've done it before gently pulling the paracord in the knot to tighten and position it, this can take a while. It can also be a useful knot for tying in tool cordage such as this Bahco Laplander saw, my Scout woodbadge has one and I have some as a fat stopper knot on my hammock whoopie slings to stop the loop accidentally pulling through. Credit to Adrian Rose for the latter suggestion.
Paracord jig.
All bracelets are doable by hand but they are a little easier if a jig is used. They are easy to make and can be as simple or complicated as you like; anything from a branch stump on a tree to a jig that can be angled with a seat. The one below is the one I usually use.
Clockwise from top left: The jig, this is made of scraps of wood from my garage and an old wood pallet. The fixing points have the two sizes of clips I'm ever likely to use attached to some folded settee leather and held in place with a movable bolt. You can also see the start of the 'ruler' on the left hand side to measure the bracelet size. The bolt itself is what I use to do a simple looped paracord bracelet over. The underneath showing the washer that holds the moveable blocks in place, not the necessary blocks that the jig sits on the lift the washer and bolt head clear of the surface that it is placed on.
Paracord wallet 'chain'
Start by selecting and cutting a suitable piece of paracord, more on the measurements later on but you will need to allow two lots of seven inch lengths to tie two knots (in this case I will be using anchor bends) plus an extra inch or two for trimming.
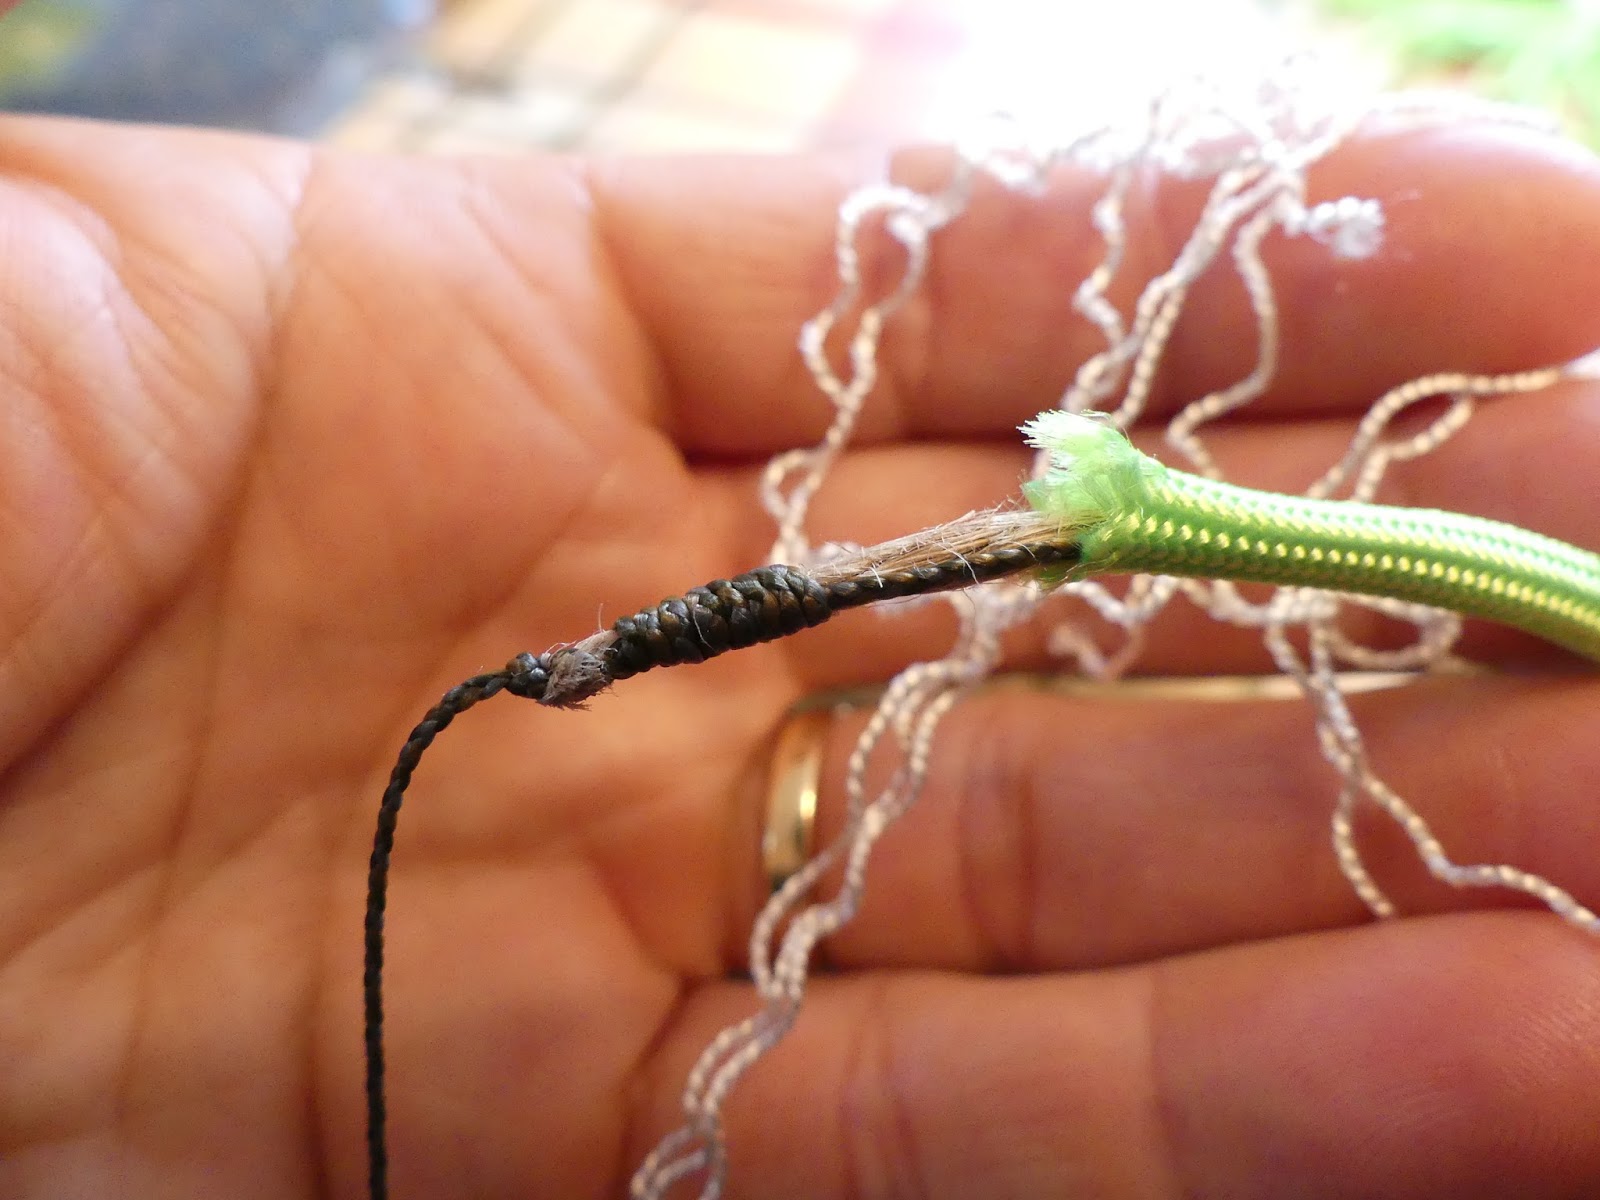
Gently pull the inner strands out a little and select one to tie a piece of wire to (the same length as the piece you have cut). Cut off a small section from the other end to re-locate the strands.
Now comes the slightly fiddly bit. Gently tug the inner strands one by one until you see the wire move the other end (make sure the wire is flattened) and then gently start to pull it through. Be mindful that all the other strands don't follow as they'll bung it up.
Snip the wire almost flush with the paracord and bend over the end and seal. If you pull too hard or the wire isn't flush it can pierce the outer core and get stuck. If it does, gently push it back and squash the paracord in your fingers.
This is where the anchor bends come in. It is pretty much a round turn and two half hitches but the end is passed between the round turns and whatever you are tying the knot around which makes for a secure knot in my humble but important opinion :) Seal it with a slightly larger waste bit and gently squash it until it is a large rivet shape.
The measurement between knotted clips is obviously up to the individual wearer but this example is for an adult (me) and is approximately 20 inches. A more bushcrafty application could be to secure your car keys when out and about in the woods or on a course. The little black paracord figure is also similarly wired and therefore poseable.
I have used one and it feels secure but it goes without saying that it isn't the same as a chain one and you use it at your own risk.
And finally, a roundup of fire, nano and microcord.
First I'll cover firecord, which is the true paracord out of the three of them. It is 550 stuff with all the inner strands but it also contains a contrasting red strip of a lighting medium called Livefire. It is moderately easy to buff up into a lightable bundle using either a ferro rod scraper or a knife.
Once buffed a ferro rod is used to well, totally obliterate the firecord...It is there under the sparks I promise you!
It was fairly easy to light and burns well on it's own, or with the paracord itself, but if you've done any paracord knitting before this point of the blog you'll know it's smelly stuff when it lights.
Livefire is supposed to be totally waterproof and I decided to try this out too. I left a piece sitting in a tumbler of water and it sank which I didn't expect for a waterproof product. I squeezed the length through finger and thumb and again, buffed it like the dry test.
It did light but burnt with a smaller weaker flame than the dry example. The firecord does work, is handy and can be hung from a rucksack etc, but my choice would be a couple of pieces of Hammaro fire lighter which works in wet conditions and can be secreted in a pocket or rucksack pouch and doesn't create the noxious smoke that burning nylon paracord does.
I tried making my own version by removing some inner strands and then threading some natural jute string (which takes a spark well) using a similar technique to the wallet strap from earlier and it is possible but I found that it made the inner strands bunch up and often come out. Firecord is more expensive than regular 550 cord but equally you don't need much so I'd suggest the DIY route would be good for just practicing pulling stuff through the outer core really.
Next on the list is nanocord which isn't paracord 550 in the true sense. It is also nylon but it has no internal strands, has just short of 40 pounds breaking strain, and is around 0.75 mm thick (the above picture has some regular paracord in it for comparison). I have still included it because it can still be utilised into a decent amount of cordage when made into a bracelet (or similar) using the cobra weave, it is worth pointing out that it is a bit fiddly to use like this and would benefit from being anchored.
You'll need just over 10 inches for every inch weaved (assuming it's round a loop of nanocord). I used some of this to pull the jute string through the above project and you can see it is pretty much the same diameter as the fire cord inner strands. As well as bracelets it could also be used to whip rope ends and as an all purpose length of cordage that doesn't have the bulk of paracord 550. I used some of this to pull the jute string through the above project and you can see it is pretty much the same diameter as the fire cord inner strands with slightly less breaking strain.
Finally we have nanocord's big brother microcord which again isn't paracord 550 and is similar in all ways to nanocord except it is 1.12 mm thick and has a breaking strain of 100 lb which is a good trade off against paracord 550 in terms of size. Again it's multi use so is included because of this fact. It is less fiddly to weave than nanocord but again would benefit from being anchored. You'll get around 10 inches of weave per inch and isn't a million miles away from nanocord in that respect.
This page has presented a fair amount of technique and guff, but equally has only scratched the surface. By and large it's concentrated on the cobra weave and versions thereof. If you look closely in the left hand side picture you'll notice a few different weaves (here's one of the slightly different bracelet design weaves that I put on a Scouting forum) but I could have gone on forever. They are in there to just show that there's as many different weaves and styles out there that you have time to hunt down and do. Predictably Youtube is your friend, try looking up the likes of Stormdrane and TIAT. Please take any dimensions, breaking strains etc as representative and do some research if using anything to secure valuables and bear load etc.
And I take this Korean blogger swiping literally the whole page content with a small mention at the end as a compliment. Have a look here at my fire, nano and microcord. Now for the cheesy bit where I type "Have fun"!