My Sweet Tin Smoker Youtube video
A few years back l was lucky enough to win a hot smoker in a Ronnie Sunshines competition, It's easy to use but quite large for taking on camp.
Enter the DIY sweet tin smoker, which was actually featured in a good article in the Autumn 2017 issue of Bushcraft magazine.
You'll need two lidded buscuit or Sweet tins that are exactly the same size and can stack on top of each other, something like a disposible barbecue grill, pliers, an awl and a hammer to make this. First off you need to burn all the paint off the lids and boxes.
A useful but optional pan lifter is a useful addition for repositioning the boxes and lids on the cleansing fire.
Using the awl and hammer (or in this case an axe poll) punch a series of holes into the tin over a piece of firewood which will go on top to let the smoke in from the untouched base tin.
The lid will also need a single, slightly larger hole punching in the centre to allow the smoke to slowly ecape once it's circulated around the food.
Cut the disposible barbecue grill with the snipping part of the pliers to fit the width of a tin but to be long enough to not only fit the tin's length but to also be bent over to form two right angle supports. In the above picture I'm again using the axe poll over a piece of firewood to bend the ends.
Check that the final shelf position is not too close to the base or lid to maximise the smoke circulation around the food.
This set is now complete and can be placed directly on embers, on a disposible barbecue meatl stand or a small trivet. Note slightly larger single hole in the centre of the lid which can clearly be seen. Please take care when making this kit as the punched holes and barbecue grill edges can be very sharp.
Before using it you'll need to soak some food friendly chippings, I'm using oak in this particular instance. There are about two handfuls in here.
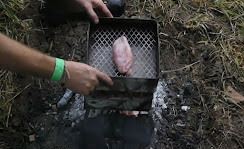
This is now set up on a trivet with a chicken breast with the chippings in the base tin, the chicken in the top tin and the lid on top. It may help the flare the lid edges a little for ease of removal depending on what tins you use.
All cooking times are dependant on what is being hot smoked, the amount and size of chippings used and ember heat but as a rough rule food takes about the same as it would if cooked without smoke.
This shot shows that the food is not only clearly smoked but is also still nice and moist. It can also be useful to have the heat and food in/under one half of the tin with the chippings the other which can prevent the chippings burning excessivly.
The grill is also useful for making toast too!
I made the hot smoker whilst on camp but it is also quite at home on both a large firepit and a regular/ gas barbecue.
Chicken is a really nice meat to hot smoke but equally things like bacon and salmon are good bedfellows with smoke and have the advantage of all being easy to source. It is usual to smoke meats without marinades but I find Salmon is nice smoked with a little seasoning on.
The paler one is a shop purchased condiment whilst the more coloured meat is covered with a mix of paprika, turmeric, salt, pepper and sugar. Smoke still comes into contact with the sides and to me it's the best of both worlds.
The grill which I used for toasting earlier in the blog can also be removed and used to place the meat near the fire if you feel it needs a little boost to cook it through. This is an easy to complete project and very satisfying to use.


No comments:
Post a Comment