If you are a hobbyist bushcrafter (or anything similar to that) then there's a good chance that you'll know that Dave Watson (Woodland Survival Crafts) is synonymous with traditional fire lighting methods, a view that was heavily reinforced in me when flicking through his many articles in some of the early Bushcraft and Survival Skills magazine issues. That's not to say Dave is all about fire because he did many non-fire articles, he runs a series of different courses and is an established IOL trainer and assessor.

Pic from The Bushcraft show 2016.
I've become reasonably competent with a bowdrill and regularly update and tweek this labour of love blog page. In early 2014 I arranged a bowdrill 1-2-1 with Jason Ingamells at the World of Bushcraft to talk through all aspects of bowdrilling and to critique how I was doing it.
I did realise that whilst I can source materials, bring them home and make a set to use I've never done so whilst in a wood all in one go. Anyone who has read any of my most recent blogs will have seen me droning on about my sabbatical, well unlucky, here I go again. I attended my first Wilderness Gathering this year and approached Dave about a) Purchasing a hand drill and b) Sorting out a 1-2-1 with him.


As with the bowdrill earlier Dave asked my to start so he could see how I shaped up position and technique wise. He gave me some drill speed to pressure guidelines and also suggested that I needed to get my body over the set more and involved.


Dave sends out clear directions to join him in the woods, the entrance is something you may well overlook in isolation, but it is very near a prominent road sign (which is mentioned) and this Woodland Survival Crafts sign really helped too.


The first impression is good as you head down a track through thick forest. As I was here to bother wood with friction I decided to try and take in what tree species I could see. The base camp is very spacious with an impressive yurt style hub.

A smiling Dave strode over to meet me and we had a brew in the yurt whilst I gave him a potted history of where I was at with my friction fire lighting. In compiling different wood combinations for my afore mentioned bowdrill blog page I have used fair weather and Limpet shells for a bearing block to ensure continuity, so it would be interesting to get to grips with a wooden one again. We then took our brew outside where Dave had placed a large amount of bow drill kit. He then proceeded to burn in a depression with arguably the slowest, most laid back bowing action I've ever seen.

But no time to sit back and admire, it was my turn. Again this wasn't a session to pop an ember but a chance for Dave to see me bowing and to analyse my stance and style. Apart from moving my foot a microsmidge closer to the drill I got a tick (as in on a chart, not one giving me Lymes disease).

We then went out for a bimble through the woods with Dave talking through the various woods with their uses in various parts of a bow drill kit. In this shot we are looking at a Laurel for the bearing block. If you ever meet up with Dave ask him to tell you his Laurel joke...


Dave also explained about actually making a bow from fresh wood with a view to using it a few weeks later, but also to use it here and now. This is a length of Hazel the he, and then I, shaped. He also showed me a useful variation on the notches for the cordage too.

It was at this stage that I revealed I had an unopened bag of survival ration Jellybabies but Dave declined any, so as I started on a slow sugar rush we went off to talk about drills, looking at various lengths, sizes and indeed colour analysis of the inner would which can tell you a lot about possible water content, age etc.


I usually go for a drill that is elbow to wrist in length but the one I was going to use is around 5cms longer so again, that was going to be interesting. I'm not the worlds best at shaping drills so I often stopped and took it over to Dave just to assess it using the you can cut more off but can't stick it back rule.


Two bases were to be made; one Lime and one Sycamore and a Froe, saw and axe were used. The Sycamore was a rather tricky attempt and although my splitting resulted in a slightly tapered end, Dave was pleased with the effort and said it had come out as well as expected. It does reinforce the point that a baseboard doesn't have to be geometrically perfect via a circular saws attentions to work. Two bearing blocks from the Laurel were then completed I was shown a nice precision cutting technique that I was, to be fair, a bit ham fisted at but it works well with a board depression too and will be worth mastering. And that was the set pretty much ready.


We checked the bow and it had adopted a narrow curve so it had a bow sting added and now was the moment to test it out. Mindful of seeing how slowly Dave bowed at the beginning I tried to emulate it...But was told to slow down. When I first taught myself I used to go from nought to nutter in the blink of an eye, only learning it wasn't necessary much later on. When you've got a natural rhythm worked out changing it is something you have to think about but sure enough the smell, smoke and dust duly arrived at laid back miles per hour.

Whilst the ember coalesced I made up a tinder bundle with a little Reedmace seed at it's centre and decided to show Dave how I'd prepared it (y'know whilst I was here and all that). when I offered the coal up to the bundle I had a bit off an issue because it had adhered to the ember pan and broke up a little but was still viable enough to produce flame.

After a quick break for some tuck we were on to the next part of the fire journey, namely the handdrill. I brought along the set that I'd purchased at the Gathering and had a basic run through whilst there. I was doing a little and often at home and had made some smoke and even got an 'ember' on the end of the drill but was finding that my hands were getting a bit sore rather quickly and I'd hit something of a wall.
Dave wanted to test the set to check it was OK (it was of course), I'd set my camera up in time lapse mode and I rather like the one above as Dave is testing the set I'm meaning business by peeling off my hoodie.

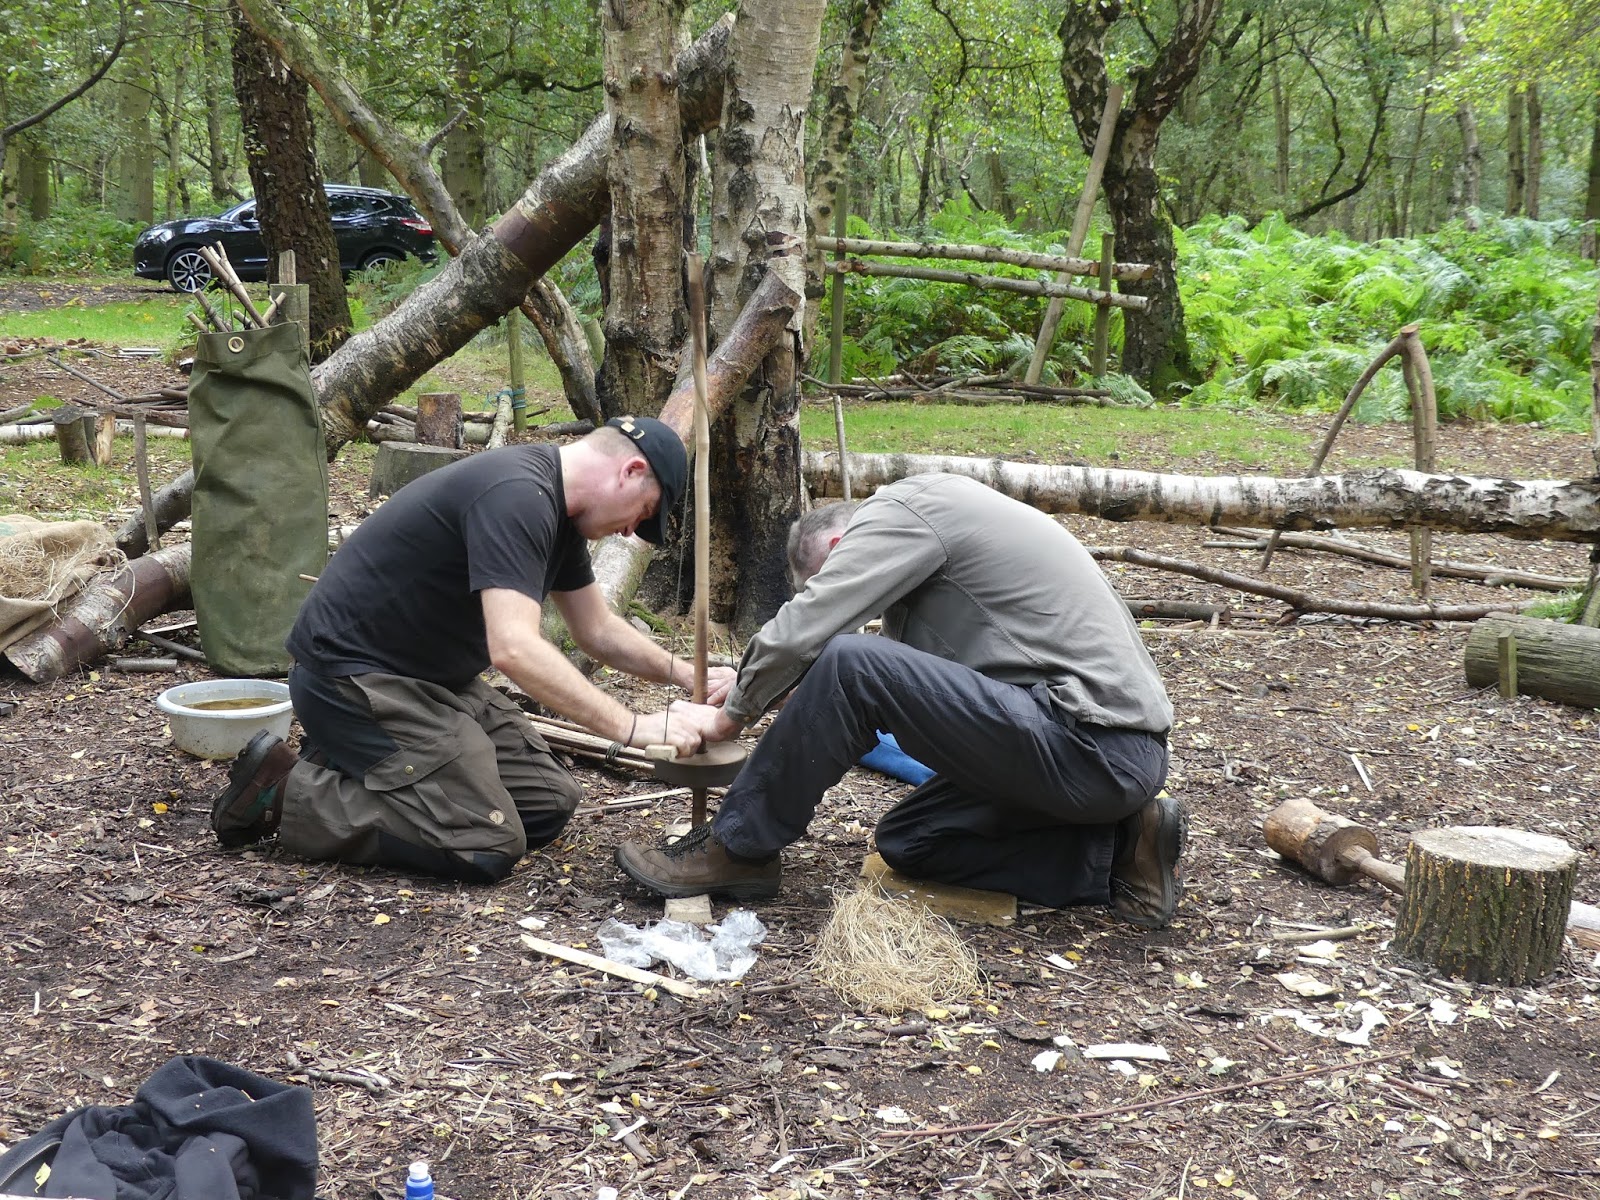
I give a good go but felt spent and frustratingly Dave reckoned 10% more umph would have seen an ember. Well I say frustrating but equally I was also buoyed that I had come so close. A rest was needed and that rest came in the shape of a play with a pump drill, so no rest at all! I'd made one at home that didn't gather enough momentum so it was handy to not only see one close up but to get some usage muscle memory. I did however think 'Damn, another project to add to the list'.

But there was no escaping the hand drill, so by the power of more consumed Jelly Babies I had another crack. Remember the slow and smooth drilling mentioned earlier? Well by the end of this attempt I was grunting and gritting teeth but when you've got a master fire maker issuing encouragement and telling you that you are close you just do.

I'm glad he did too as he suddenly exclaimed 'You've got an ember'. Seeing it whisked me back to September 28th 2008 because that was the date that I made fire using a bowdrill on attempt number five. I arrived at this ember along a different route (a purchased set and help) but that matters not one bit.

When I practice bowdrill I often don't blow the coals to flame but as this was the first hand drill coal it needed closure. Again I had a minor wobble when blowing it into a flaming mass but I got there in the end.

I'm glad I brought along a smaller second camera as Dave grabbed it and captured the moment for me which was peachy. What a way to finish the half day! I packed up my stuff and bid Dave farewell.
This experience reminds me of Andy "Bravo Two Zero" McNab's autobiography when he said during weapons training after passing an officer asked why they were doing it as they already used them. He got kicked off the training because you can always learn something new however small. I've had really useful nuggets about shaping bows, dimensions, knotting bowstrings, caring for a new ember, loading a drill, cutting bow notches, tinder bundles, speed, positioning, cutting depressions, wood analysis and probably loads more besides.

On the drive home I could occasionally smell the smoke on my hands (friction smoke smells different to smoke from a fire somehow) and it was a constant reminder of a successful and enjoyable experience. I also checked my hands when I returned home to see what state they were in after my hand drill exertions and I'm pleased to say that there were signs of wear and tear but importantly, no blisters. Dave doesn't go on social media and gets a lot of clients by word of mouth and reputation and I'm no different.
No comments:
Post a Comment